TABLE OF CONTENTS
1. Features
- Zero-Touch Patch Management
- Definition of Pilot Groups via Custom Inventory
- Patch Exclusion Rules for Different Device Groups
- Patch Management Dashboard to Visualize Active Patch Deployments
- Role-Based Management to Delegate Responsibilities
- Approvals for Patch Deployments
- Vulnerability Insights: Status Overview of All Devices for Each Vulnerability with Troubleshooting
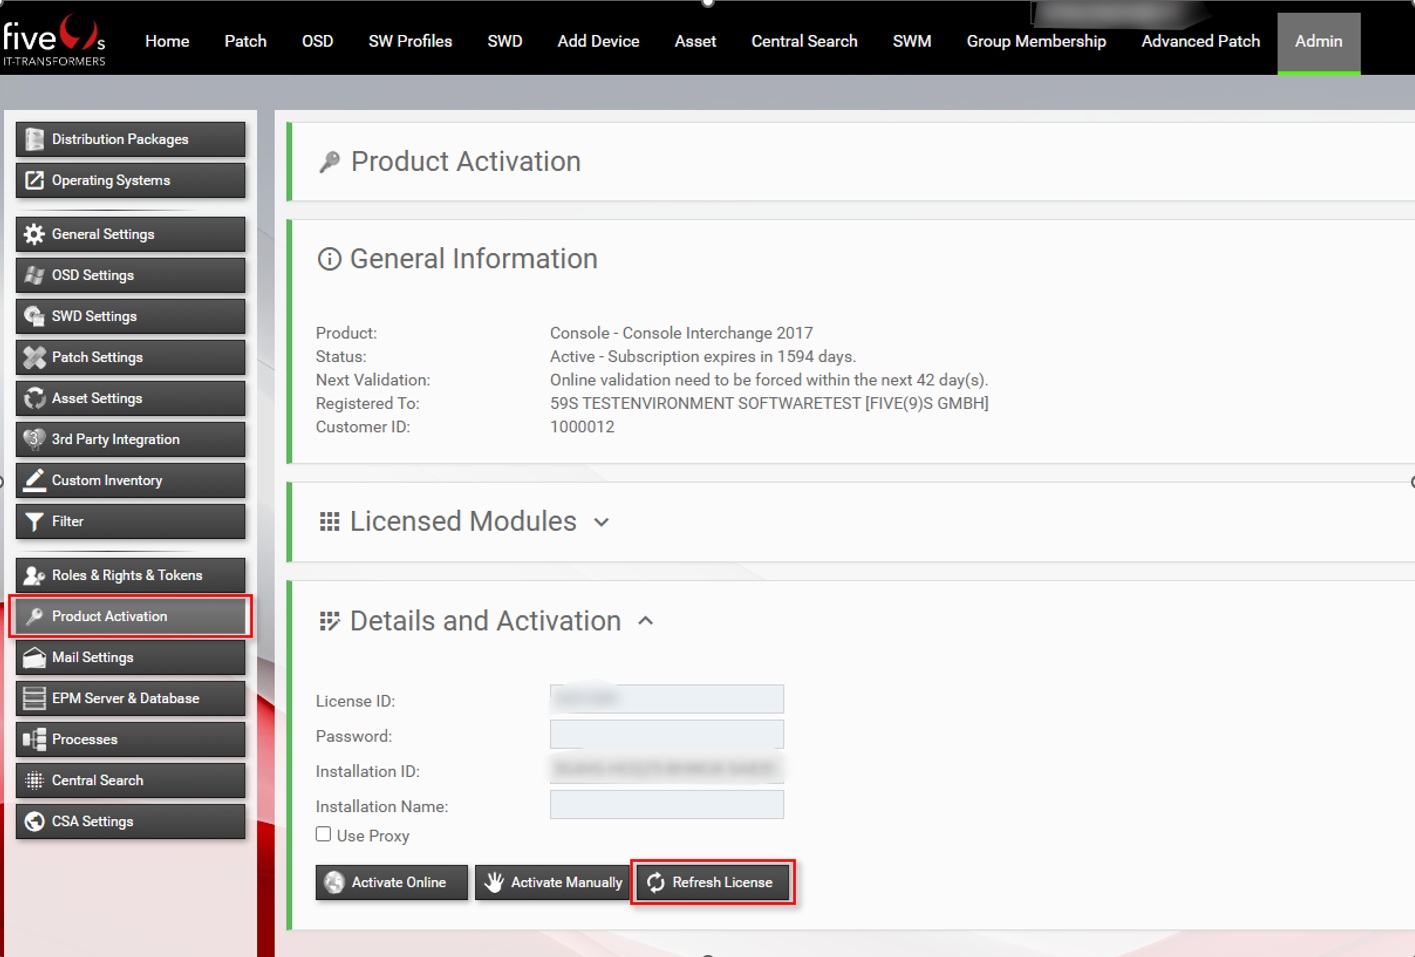
2. Licensing Advanced Patch
3. Setting up Advanced Patch
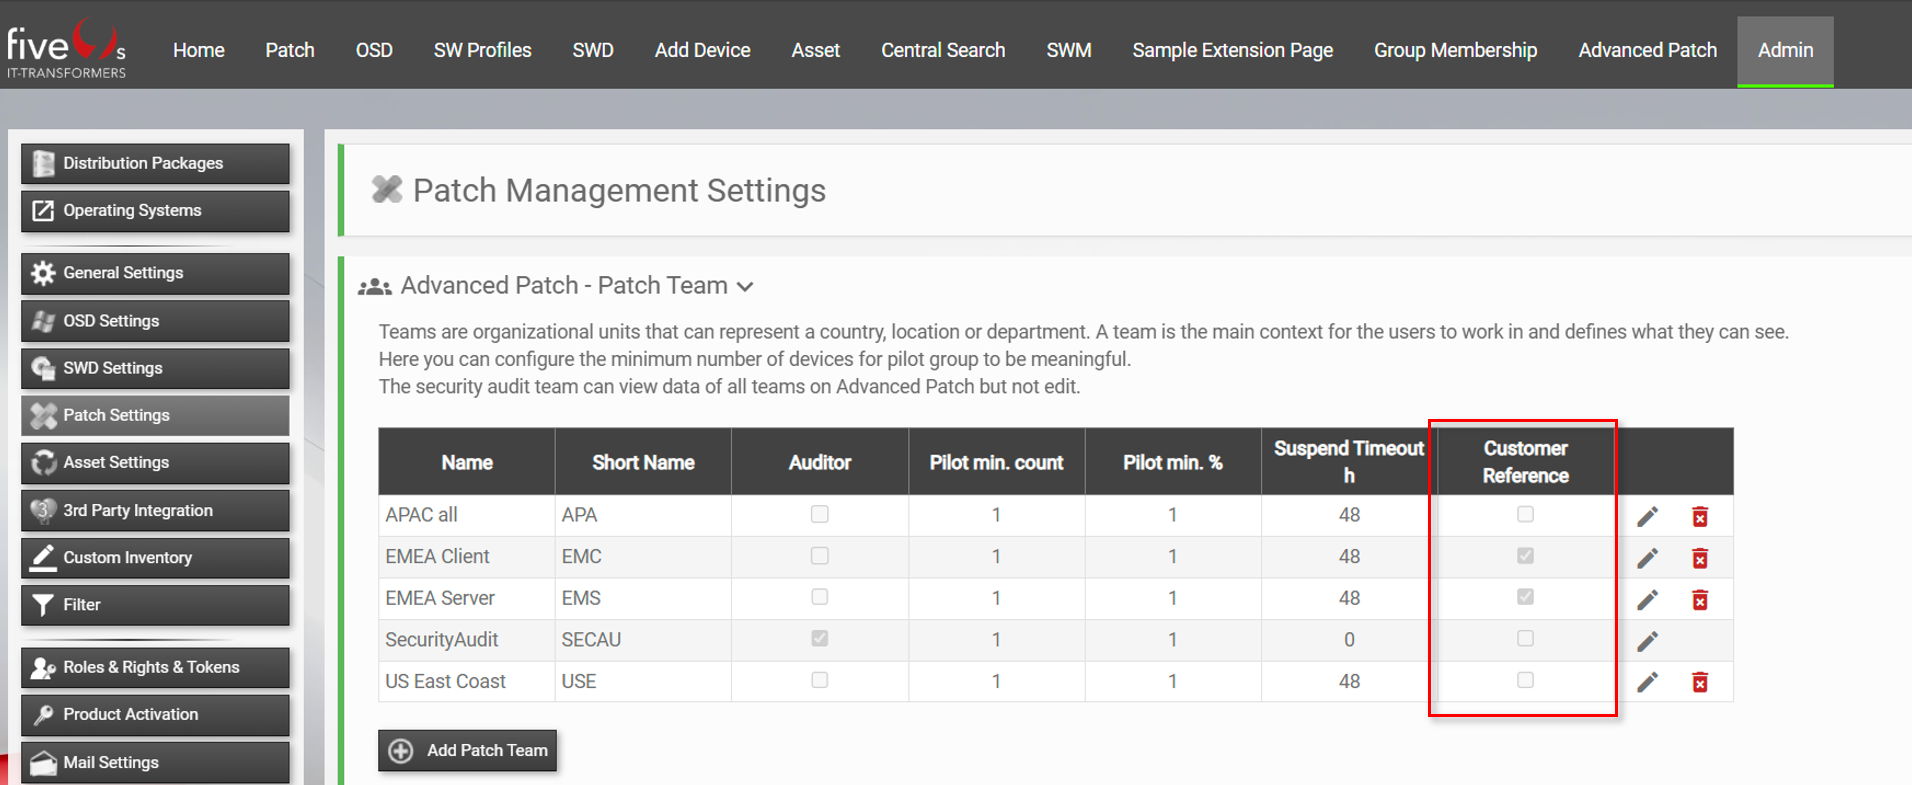
3.1. Create Patch Teams
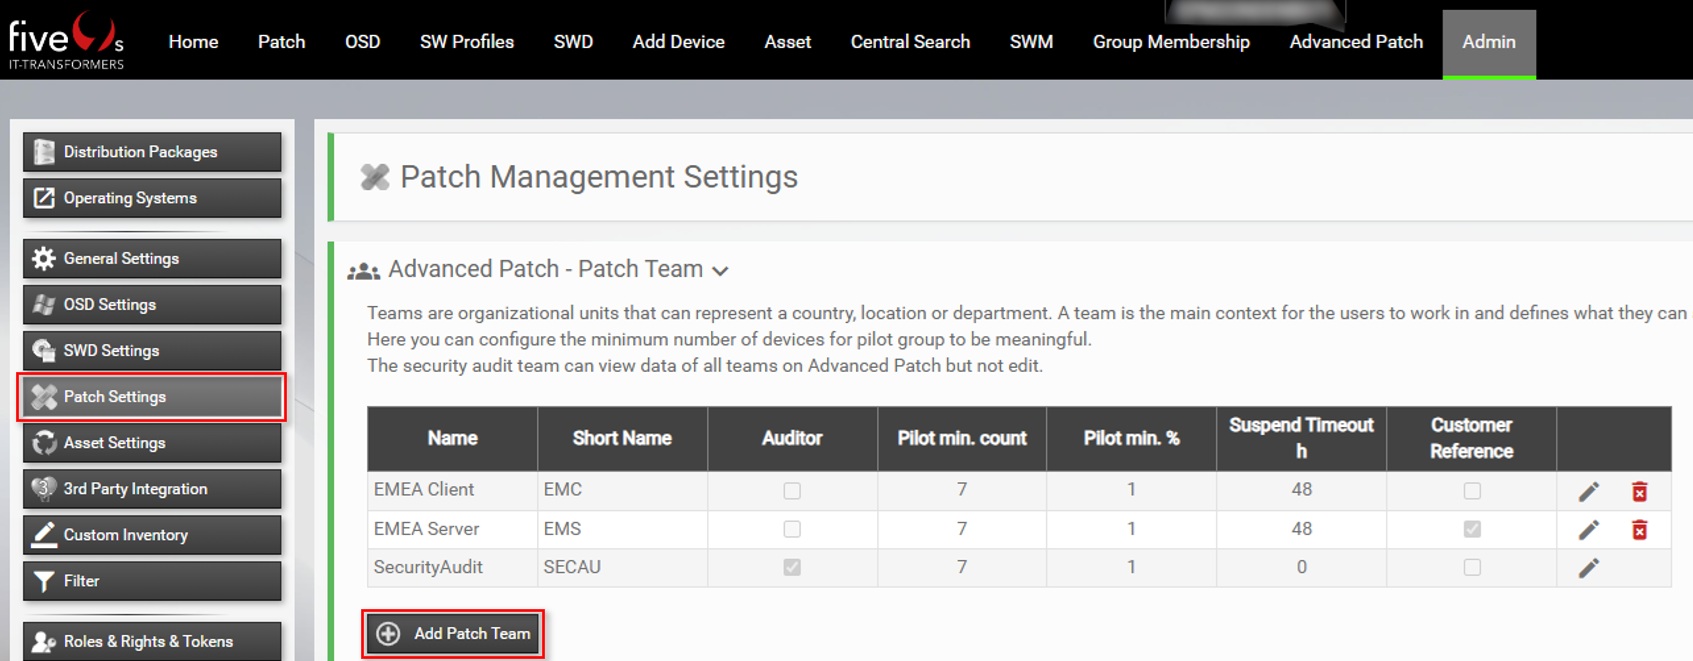
Click on Add Patch Team to create a user group, responsible for patch management of certain device groups. You will see the following dialog:
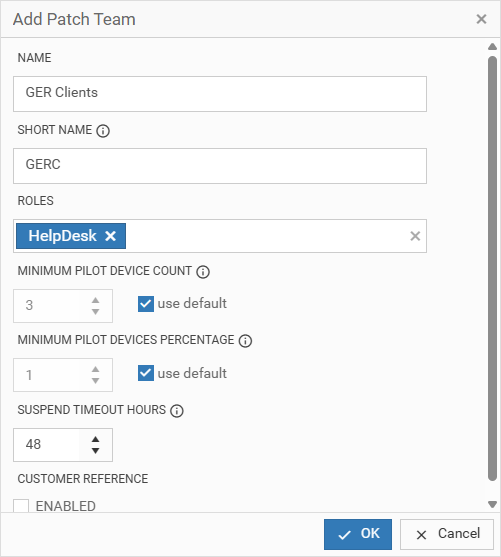
Give your team a name and short name, assign a five(9)s Console role and set a minimum pilot device count (either as a total number or a percentage). Only users with the assigned role can view this team’s patch deployments.
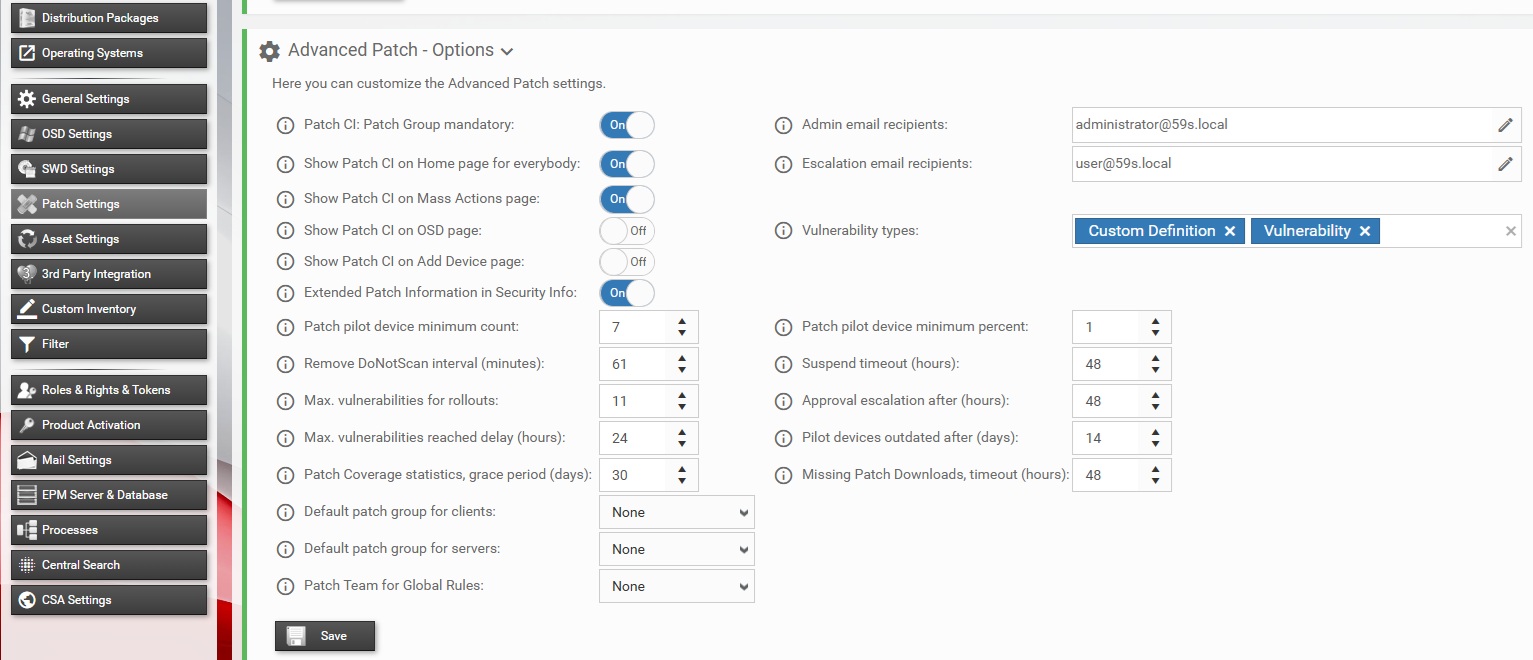
3.2. Configure Patch Options
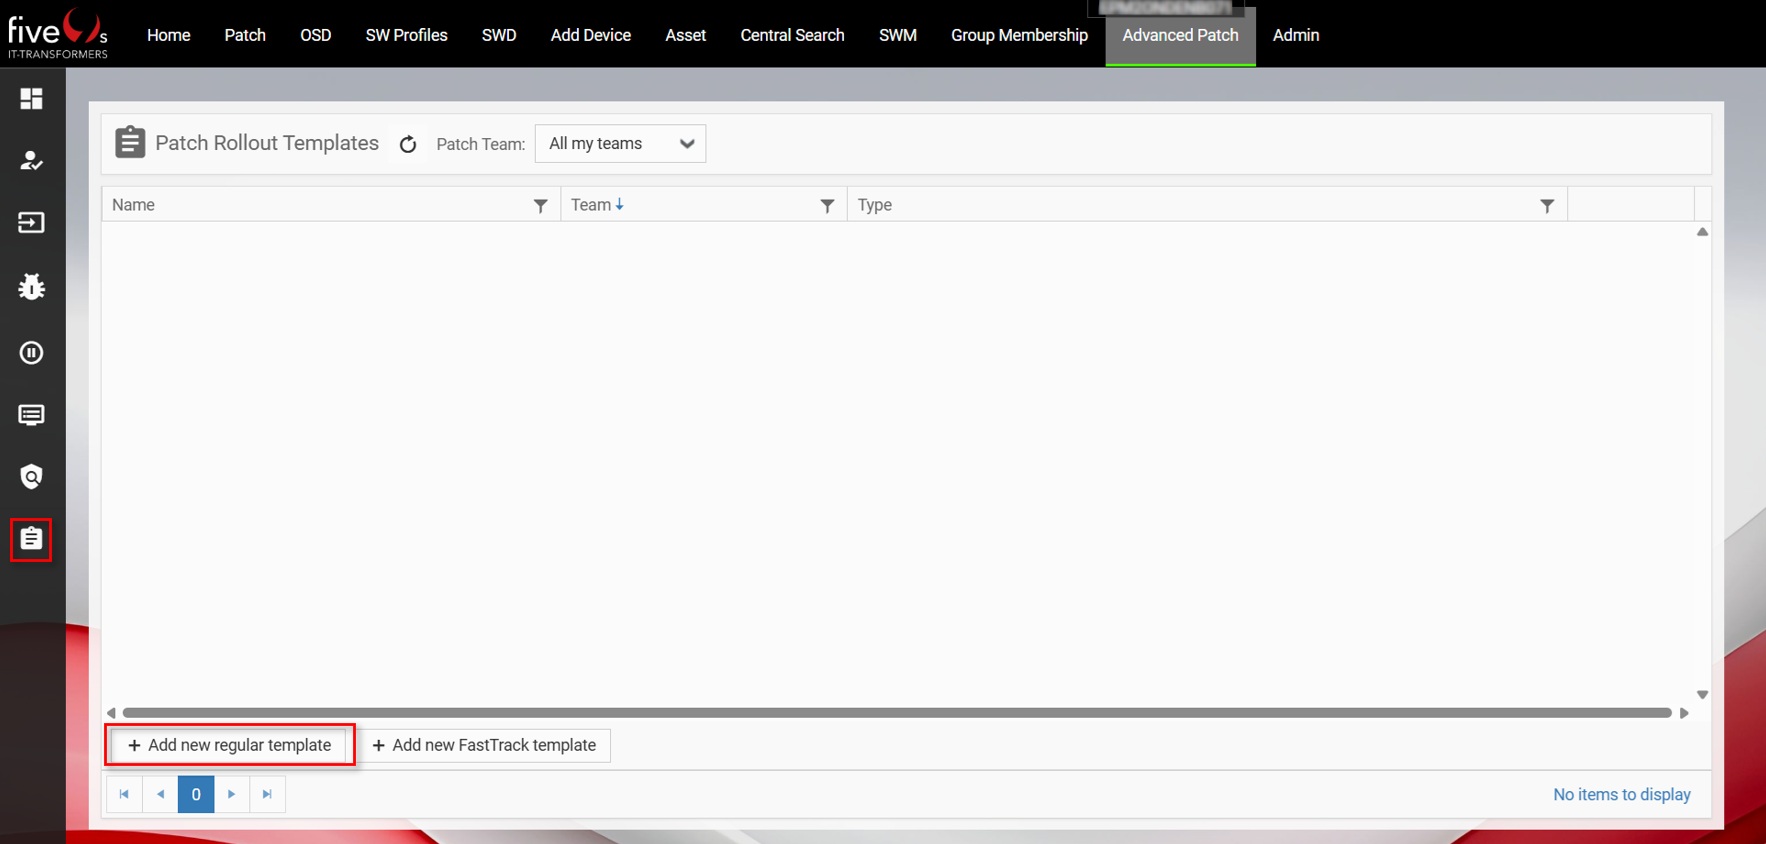
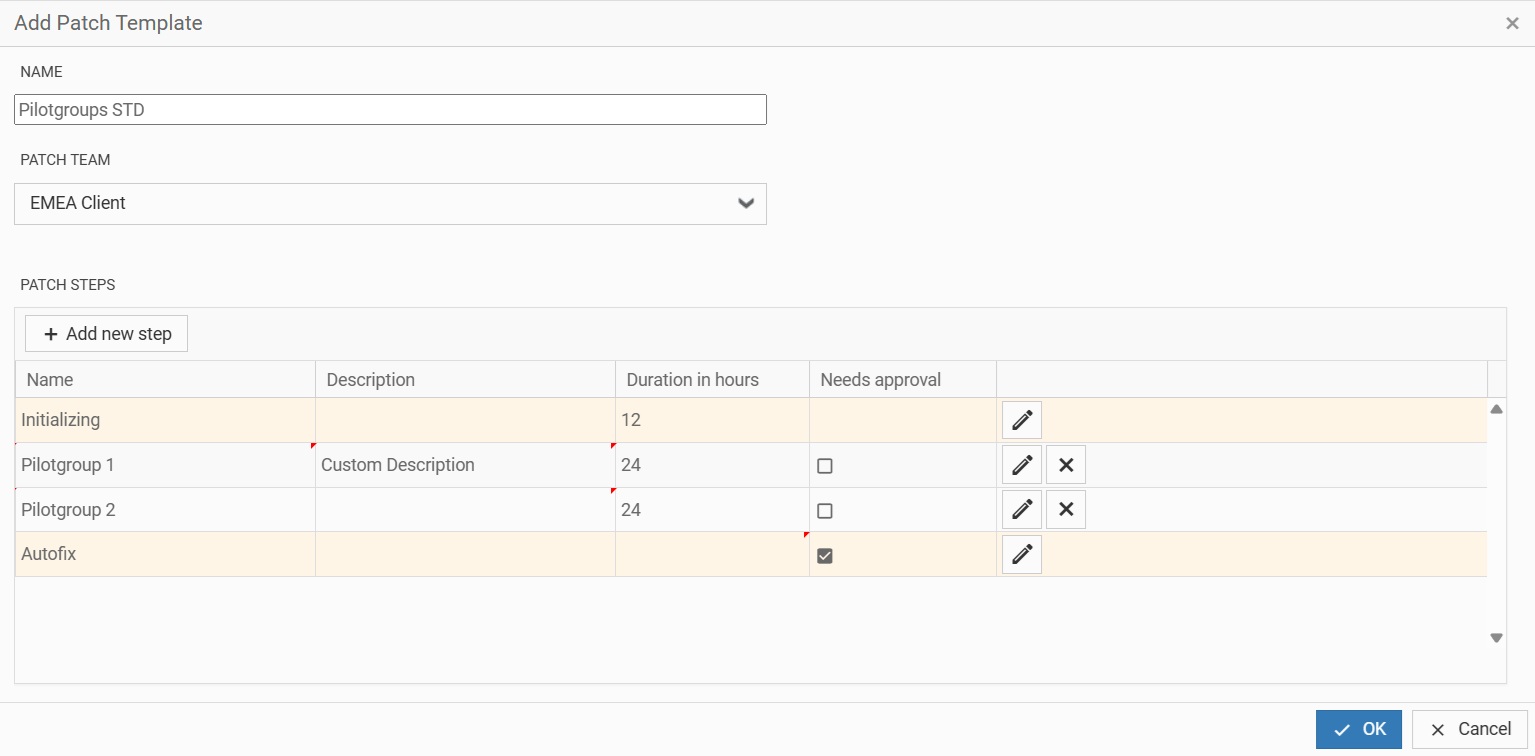
3.3. Patch Rollout Templates
- How many patch steps/pilot phases do I need?
- What is the duration of those steps/pilot phases?
- Do I need approvals before AutoFix?
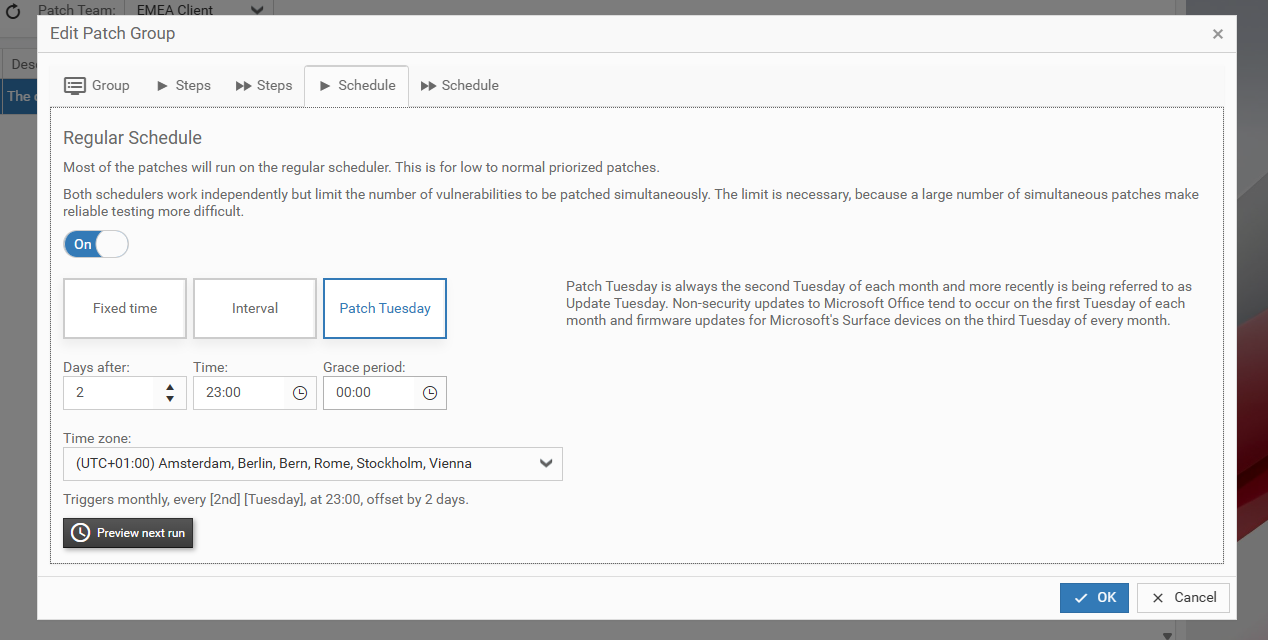
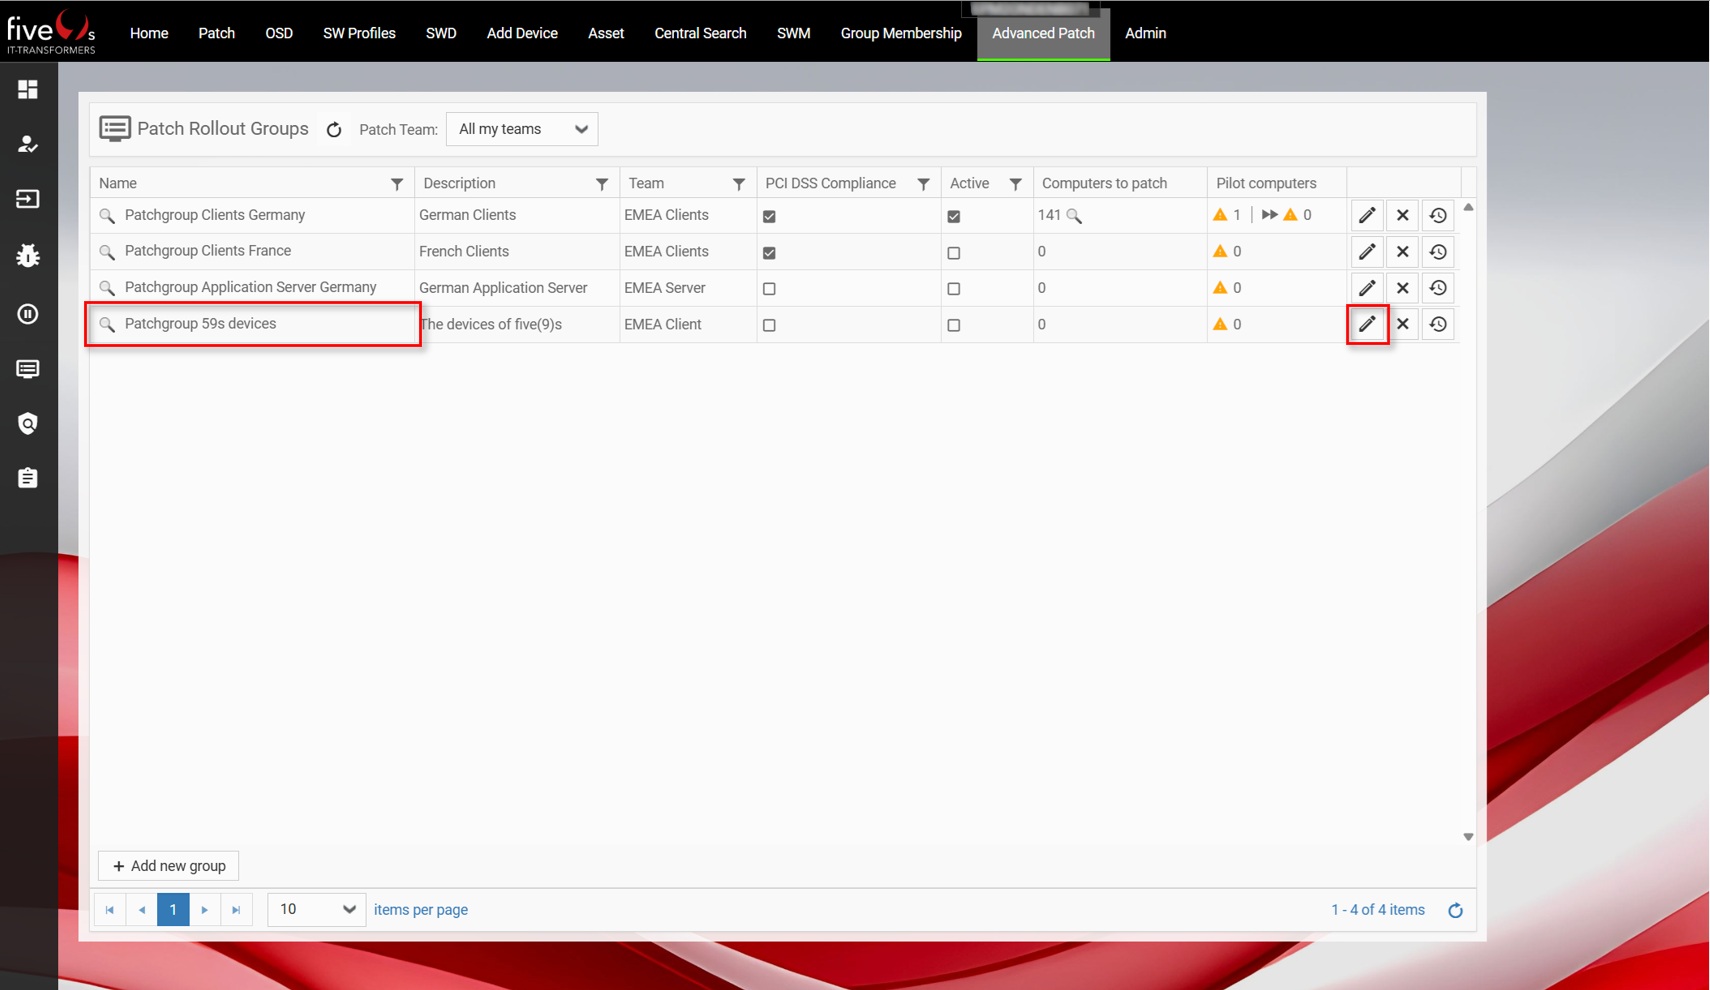
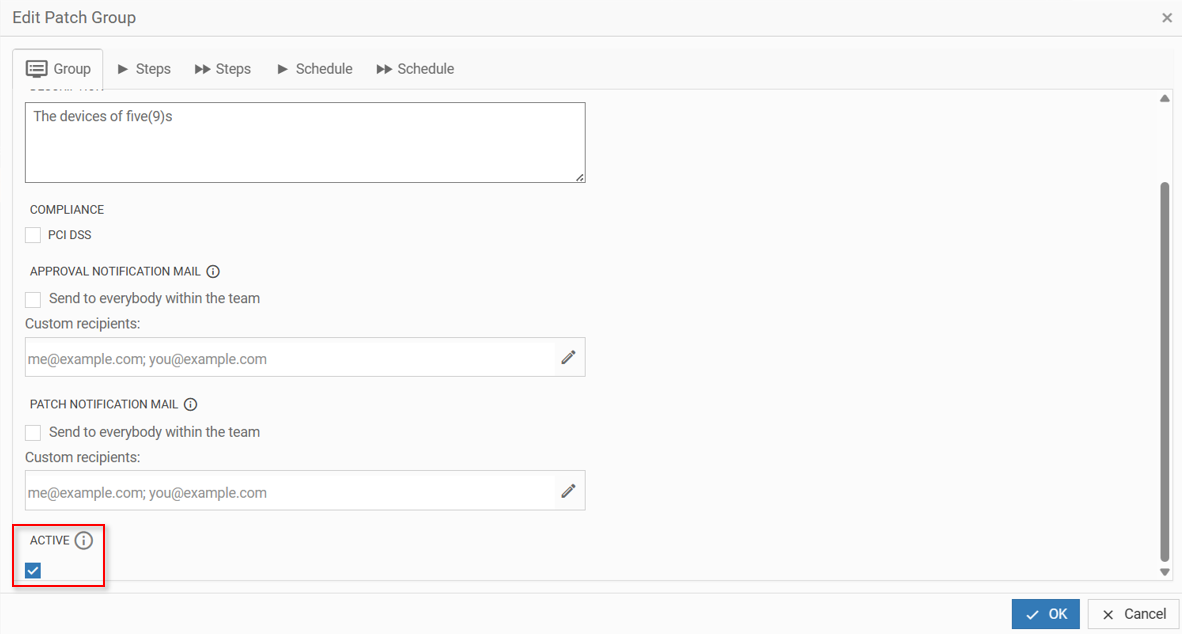
3.4. Configuring Patch Rollout Groups

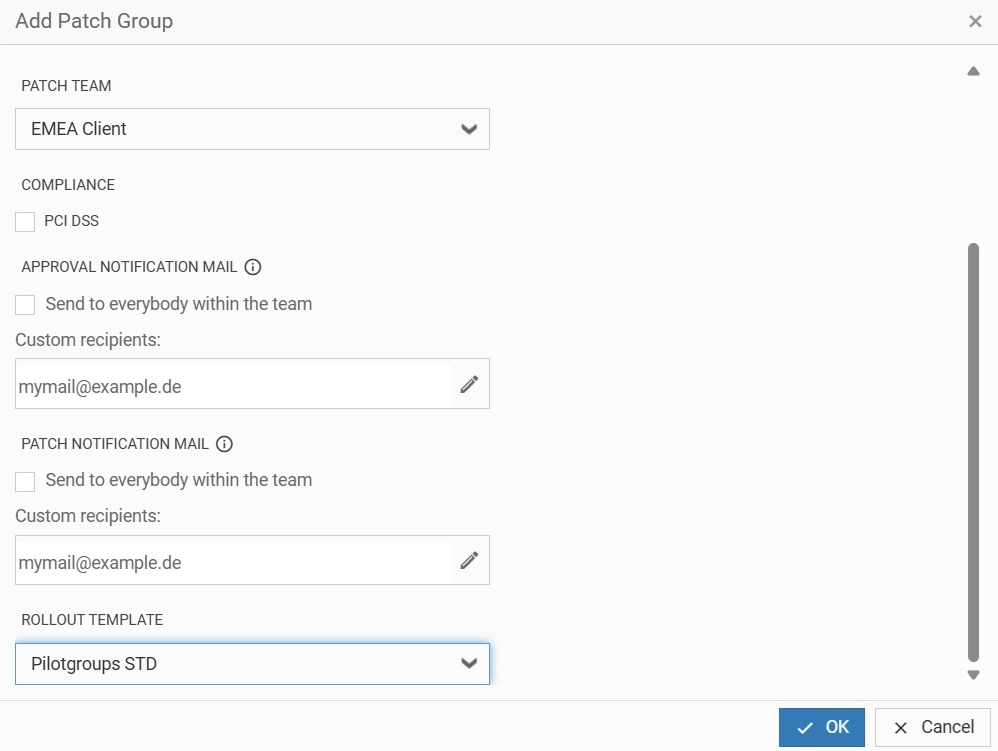
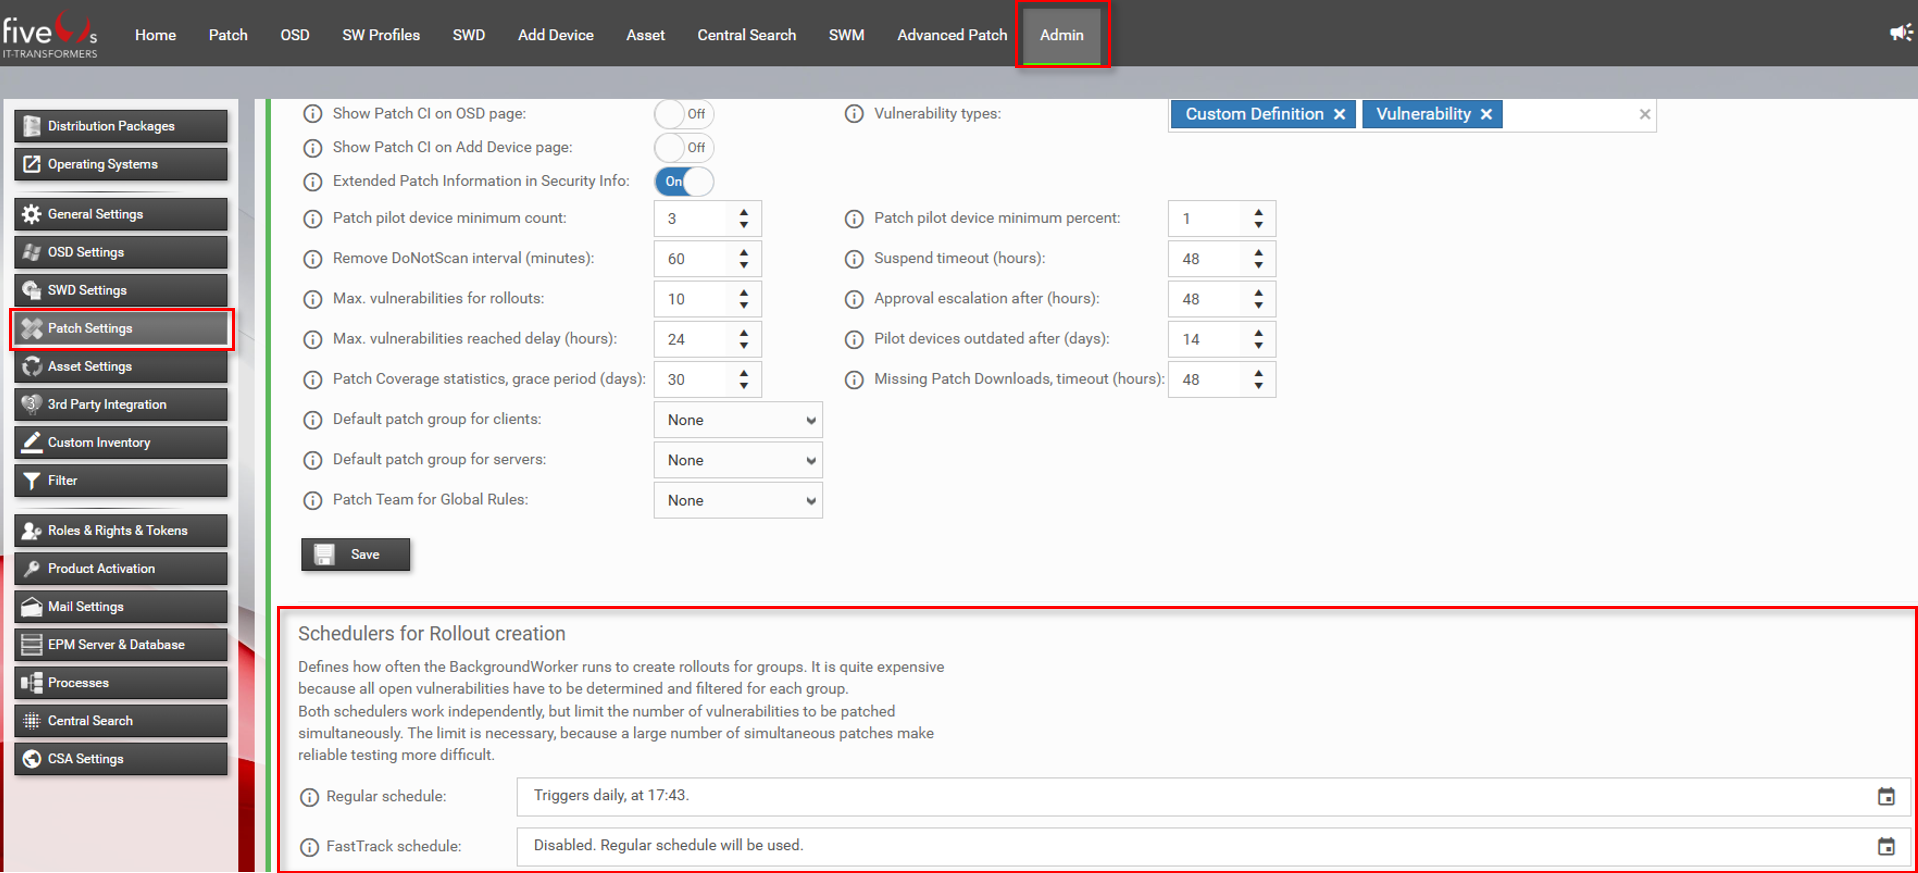
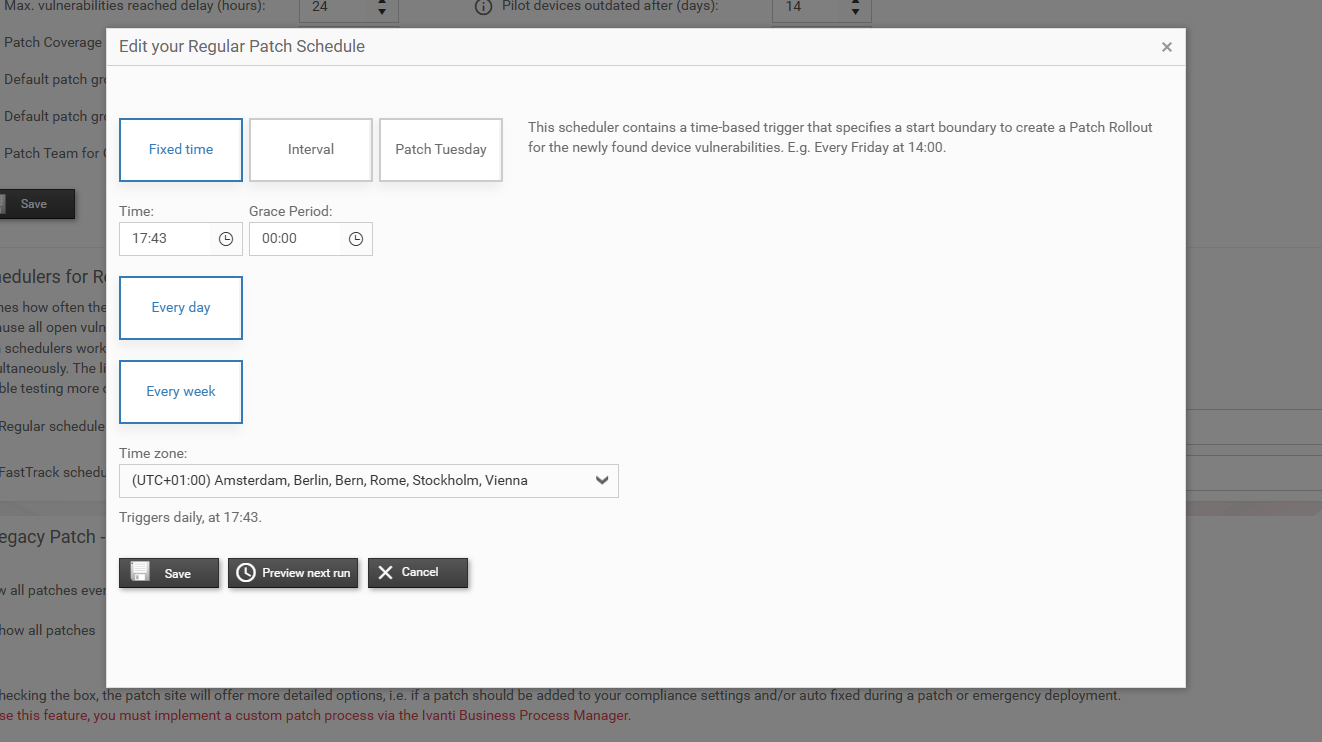
In the schedule tabs (Regular and Fast Track), you can configure individual schedulers that control when the background worker creates Rollouts. By default, the settings from the Admin page are applied (see previous section).
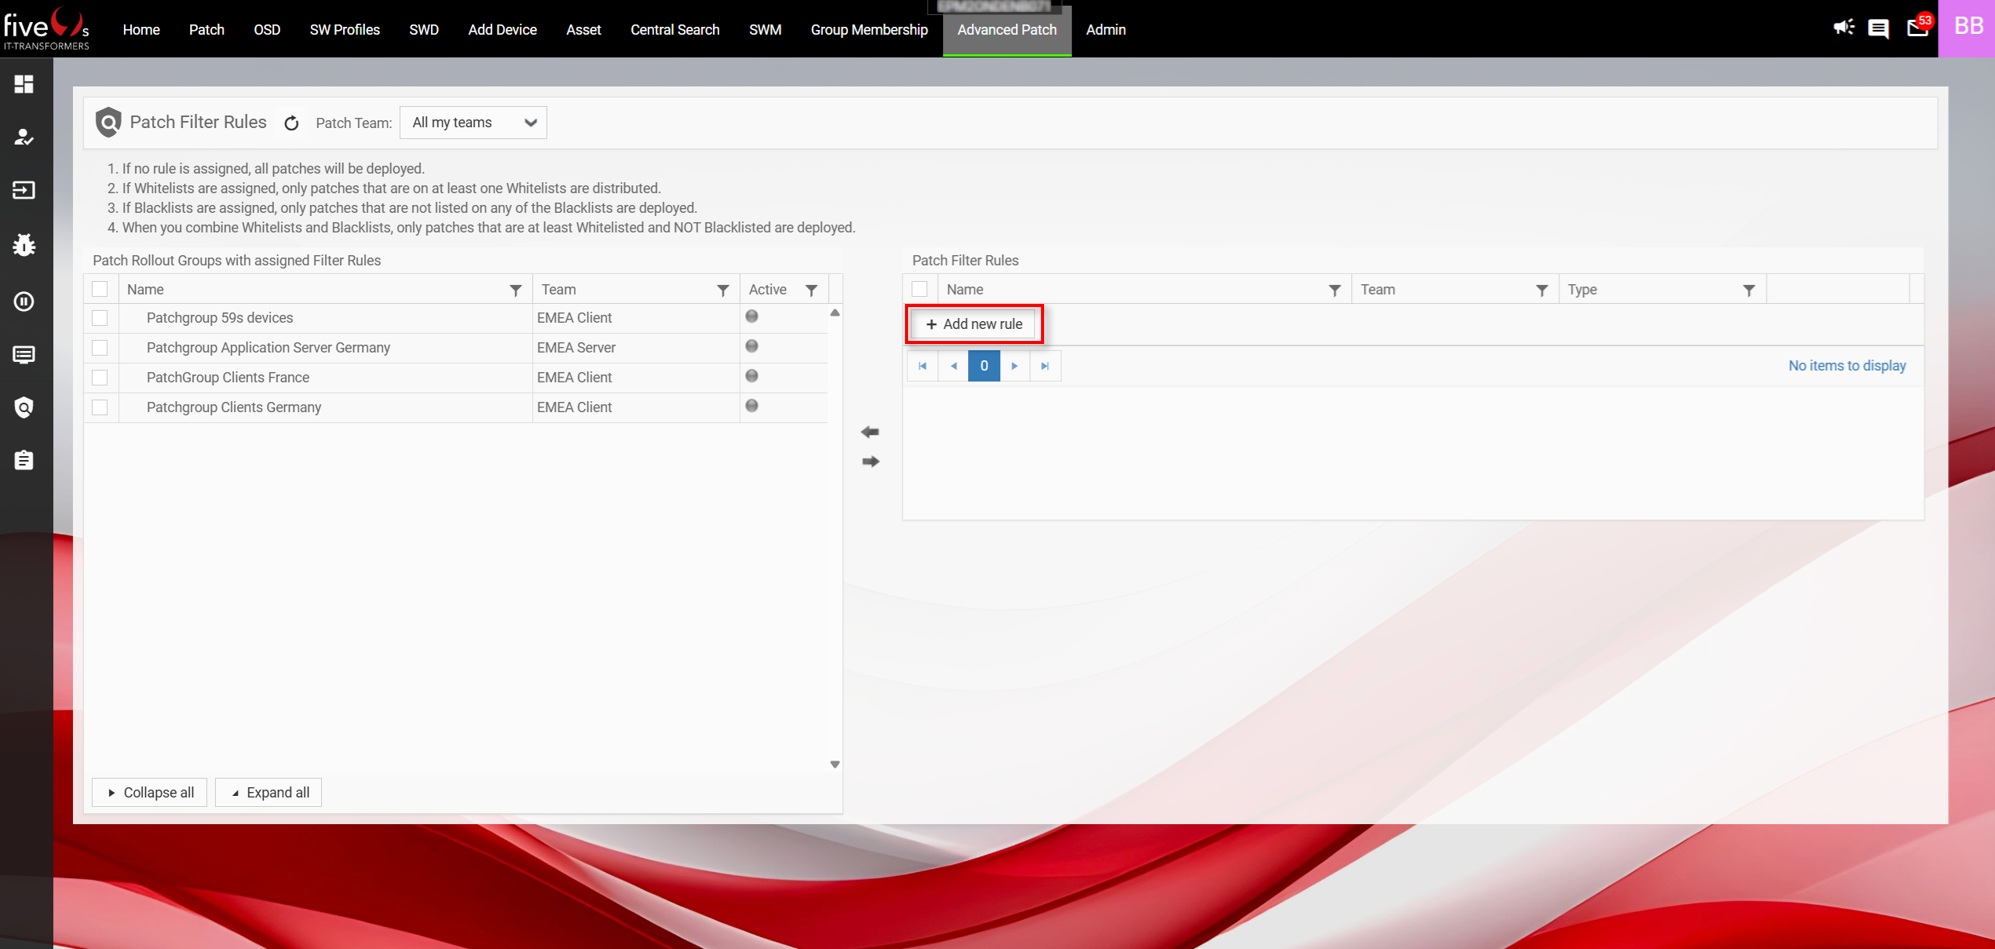
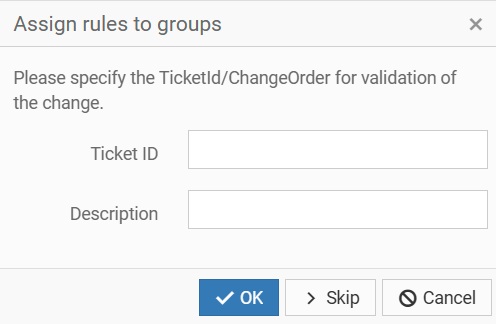
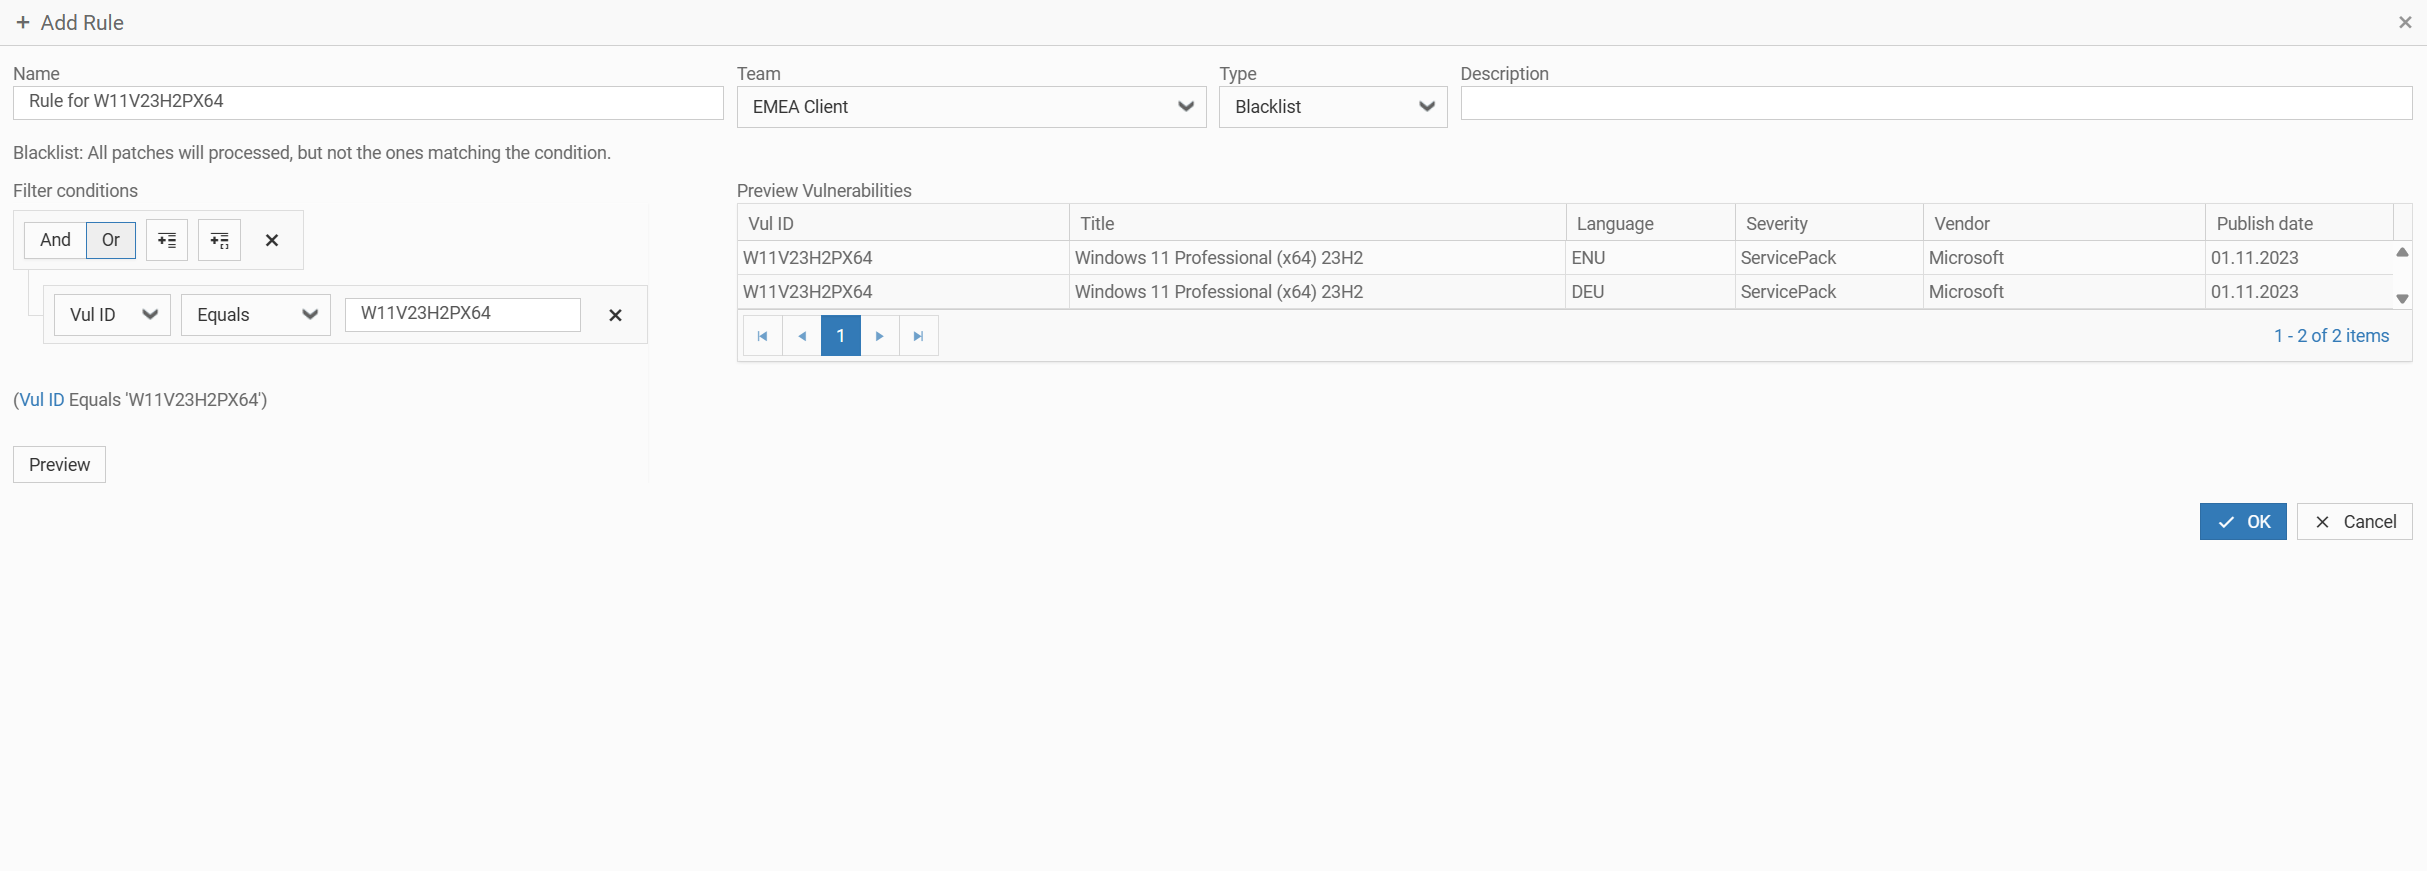
3.5. Creating Patch Filter Rules and Assigning Them to Patch Groups
- If no rule is assigned, all patches will be deployed.
- If Whitelists are assigned, only patches that are at least on one Whitelist will be deployed.
- If Blacklists are assigned, only patches that are NOT on one of the Blacklists will be deployed.
- If you combine Whitelists and Blacklists, only patches that are at least on one Whitelist and NOT on one Blacklist will be deployed.
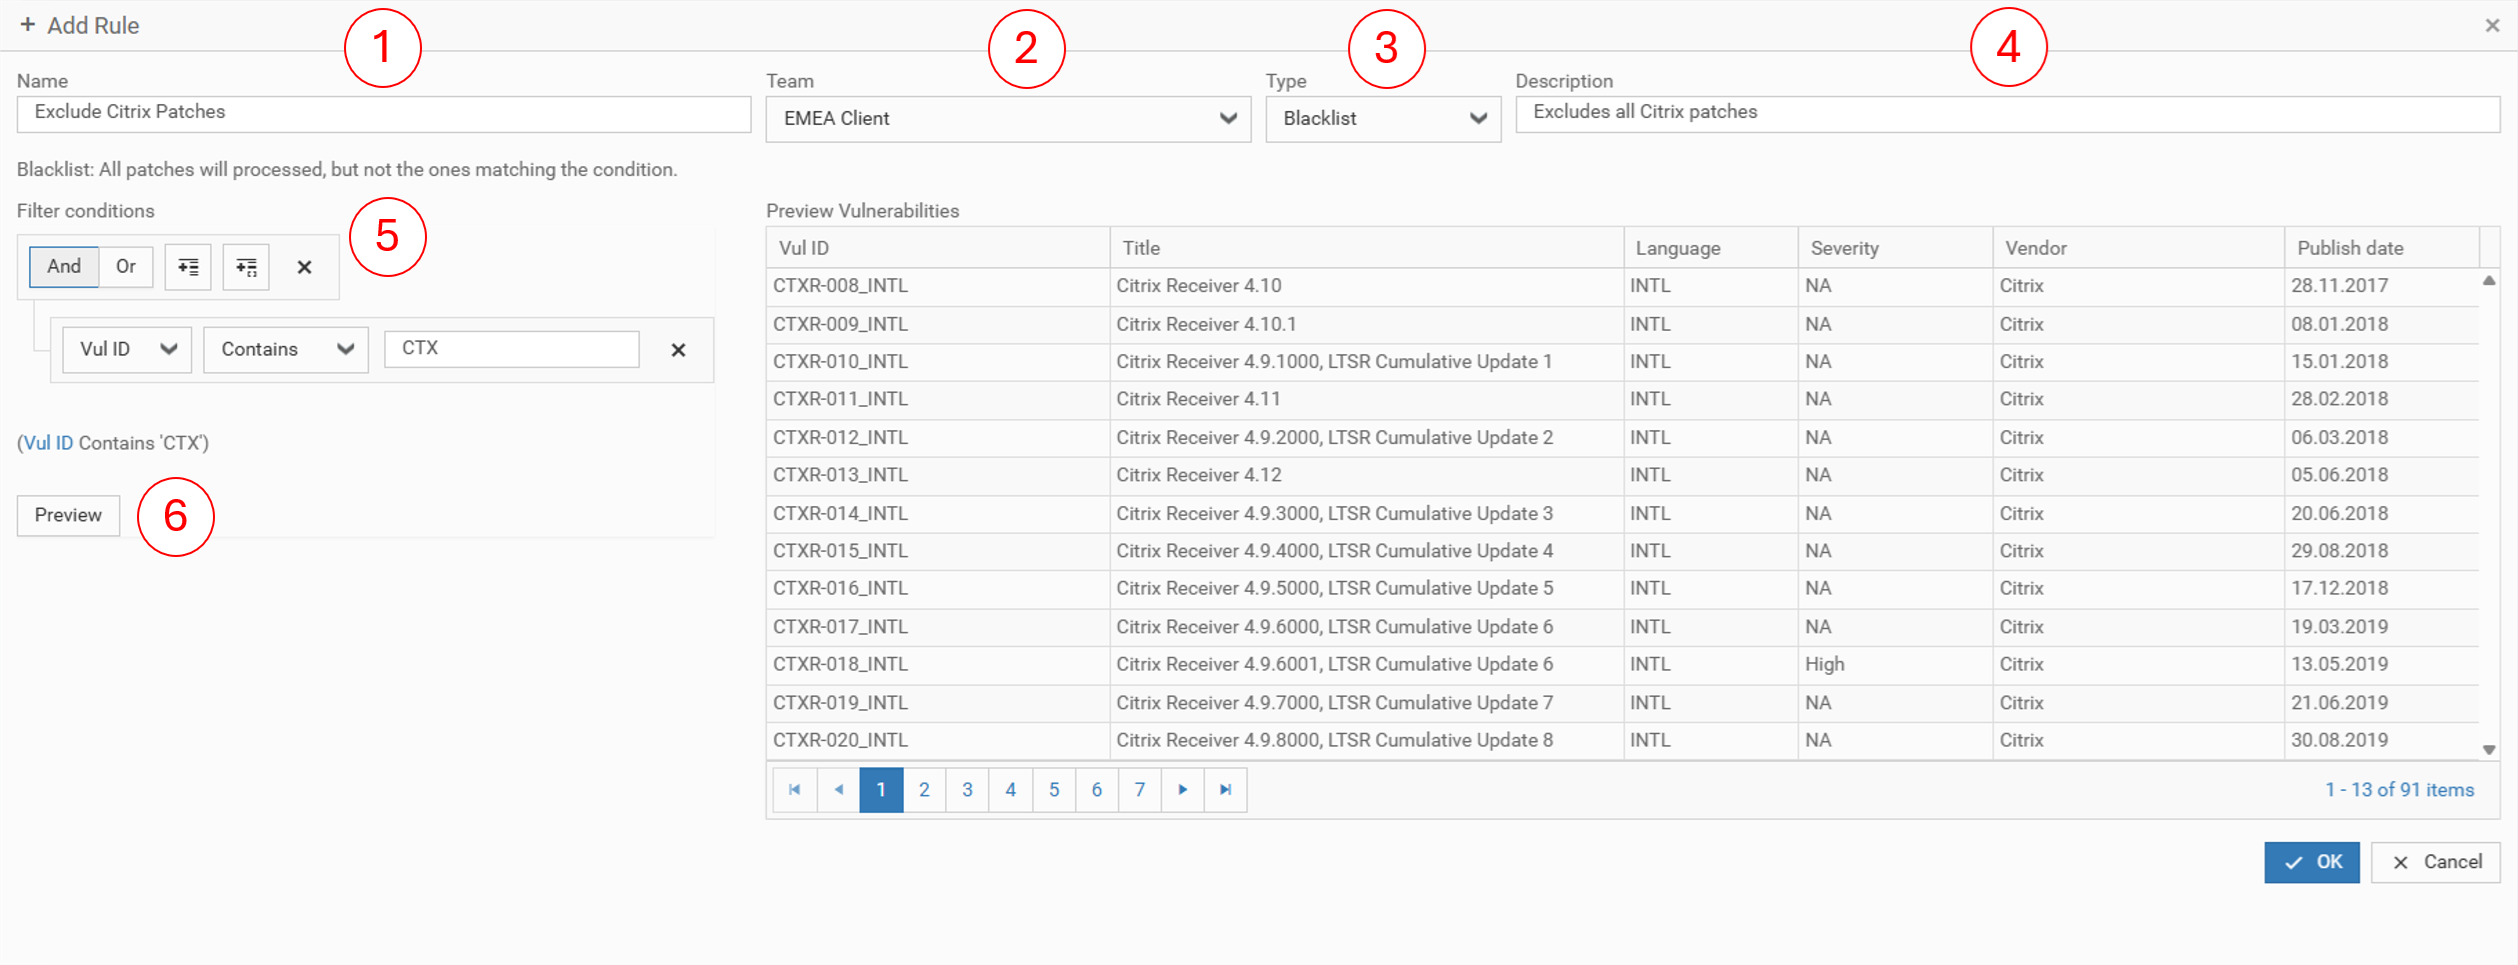
- Enter a name
- Choose a Patch Team that should work with this Patch Filter Rule
- Choose your Patch Rule type (Whitelist / Blacklist)
- Enter a description
- Define your filter condition
- Click on Preview, to check which vulnerabilities are effected by your Patch Filter Rule
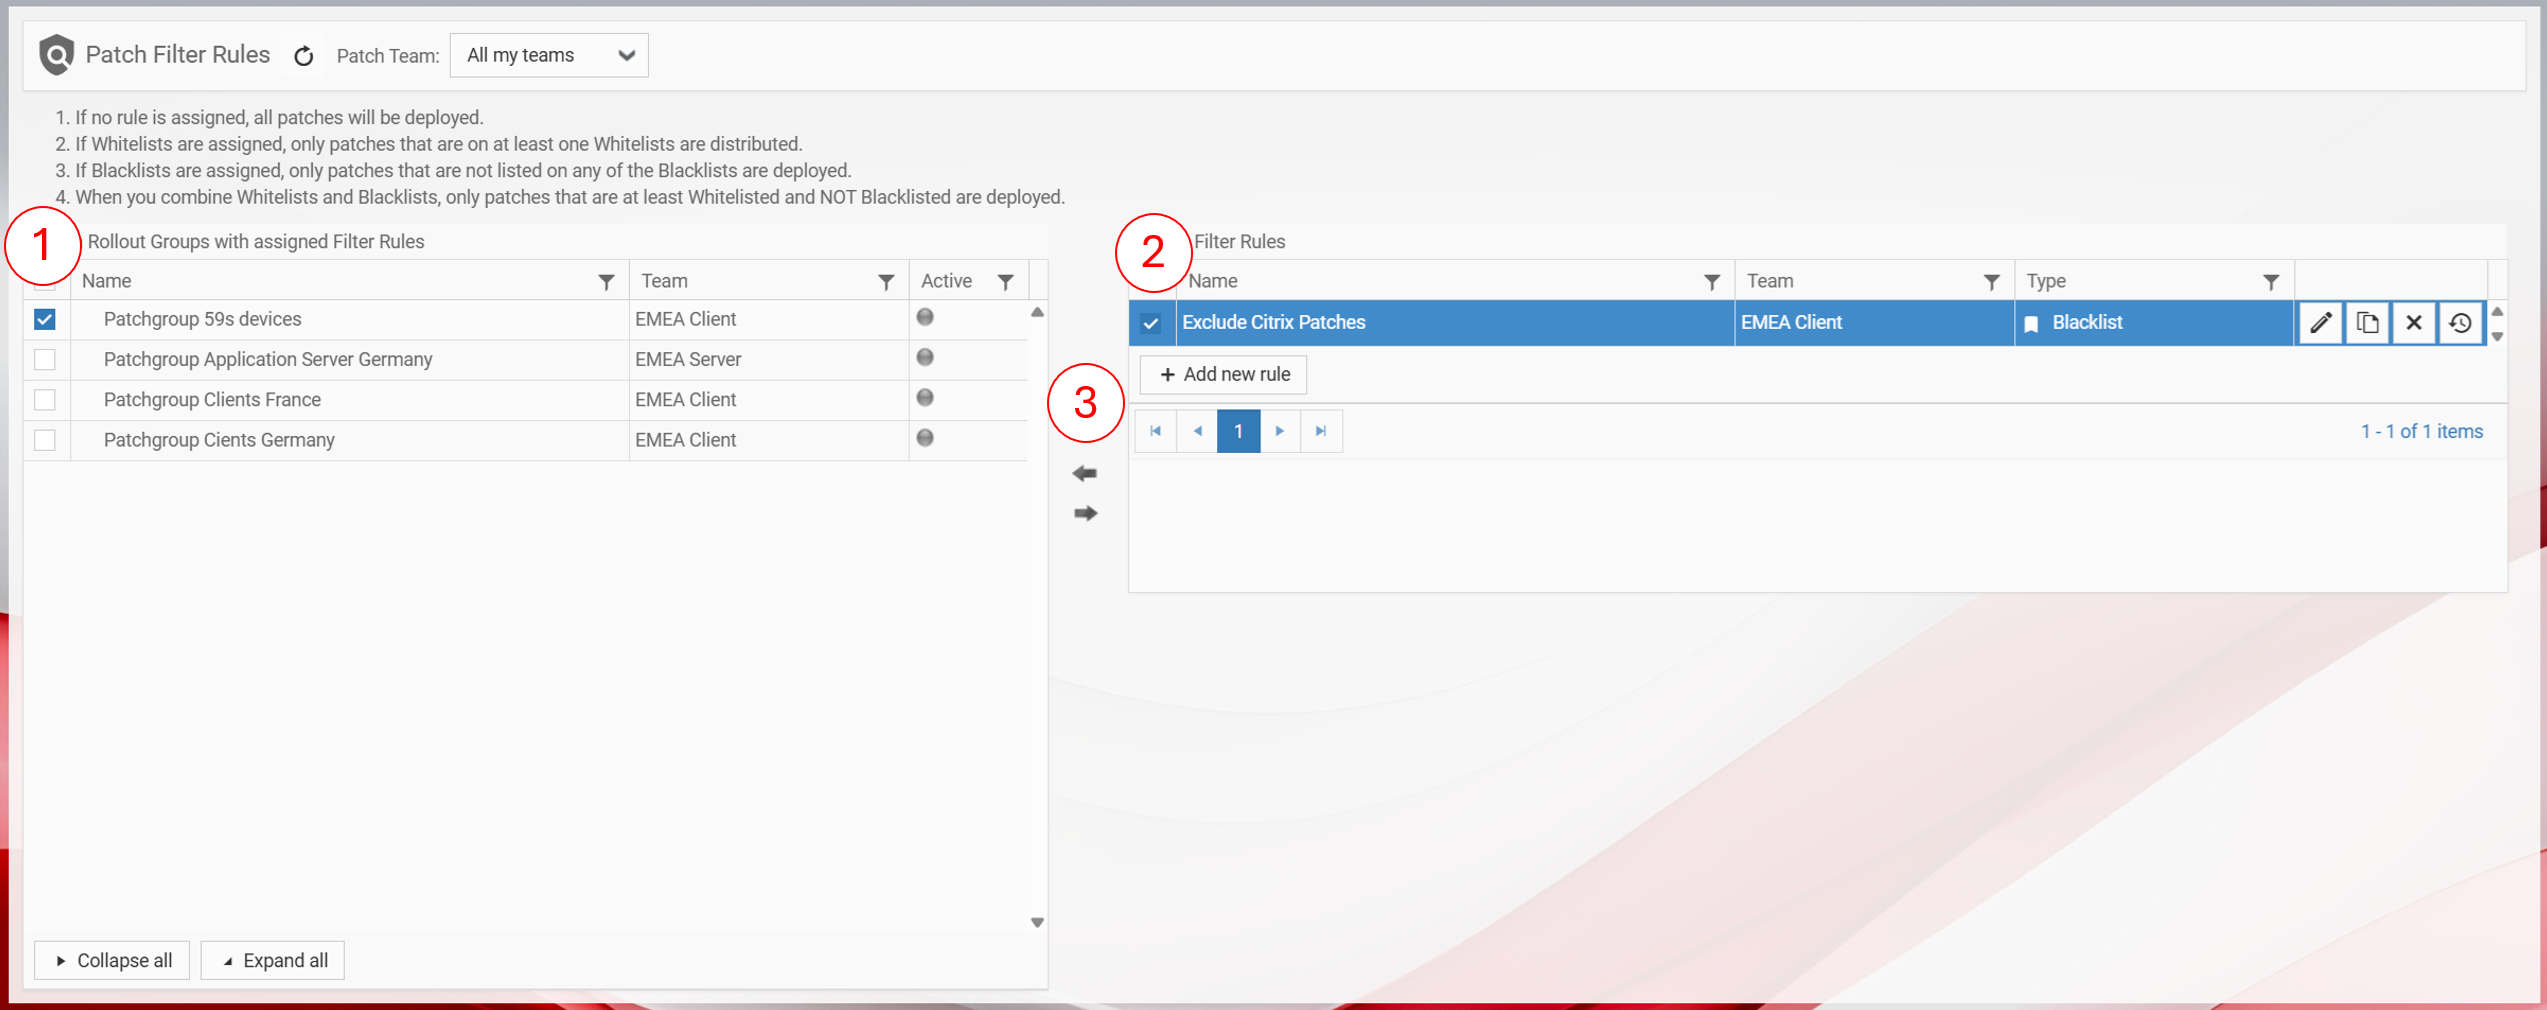
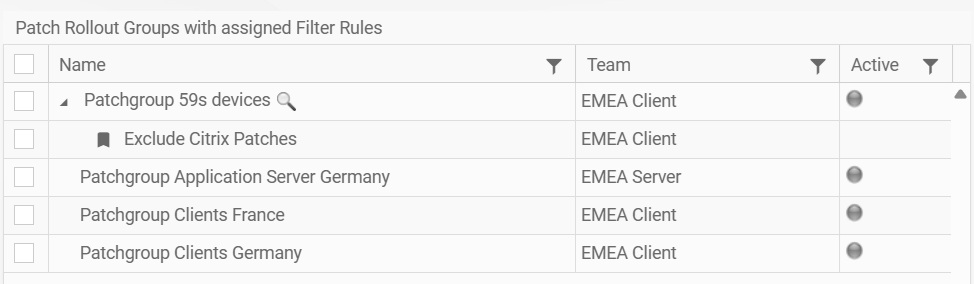
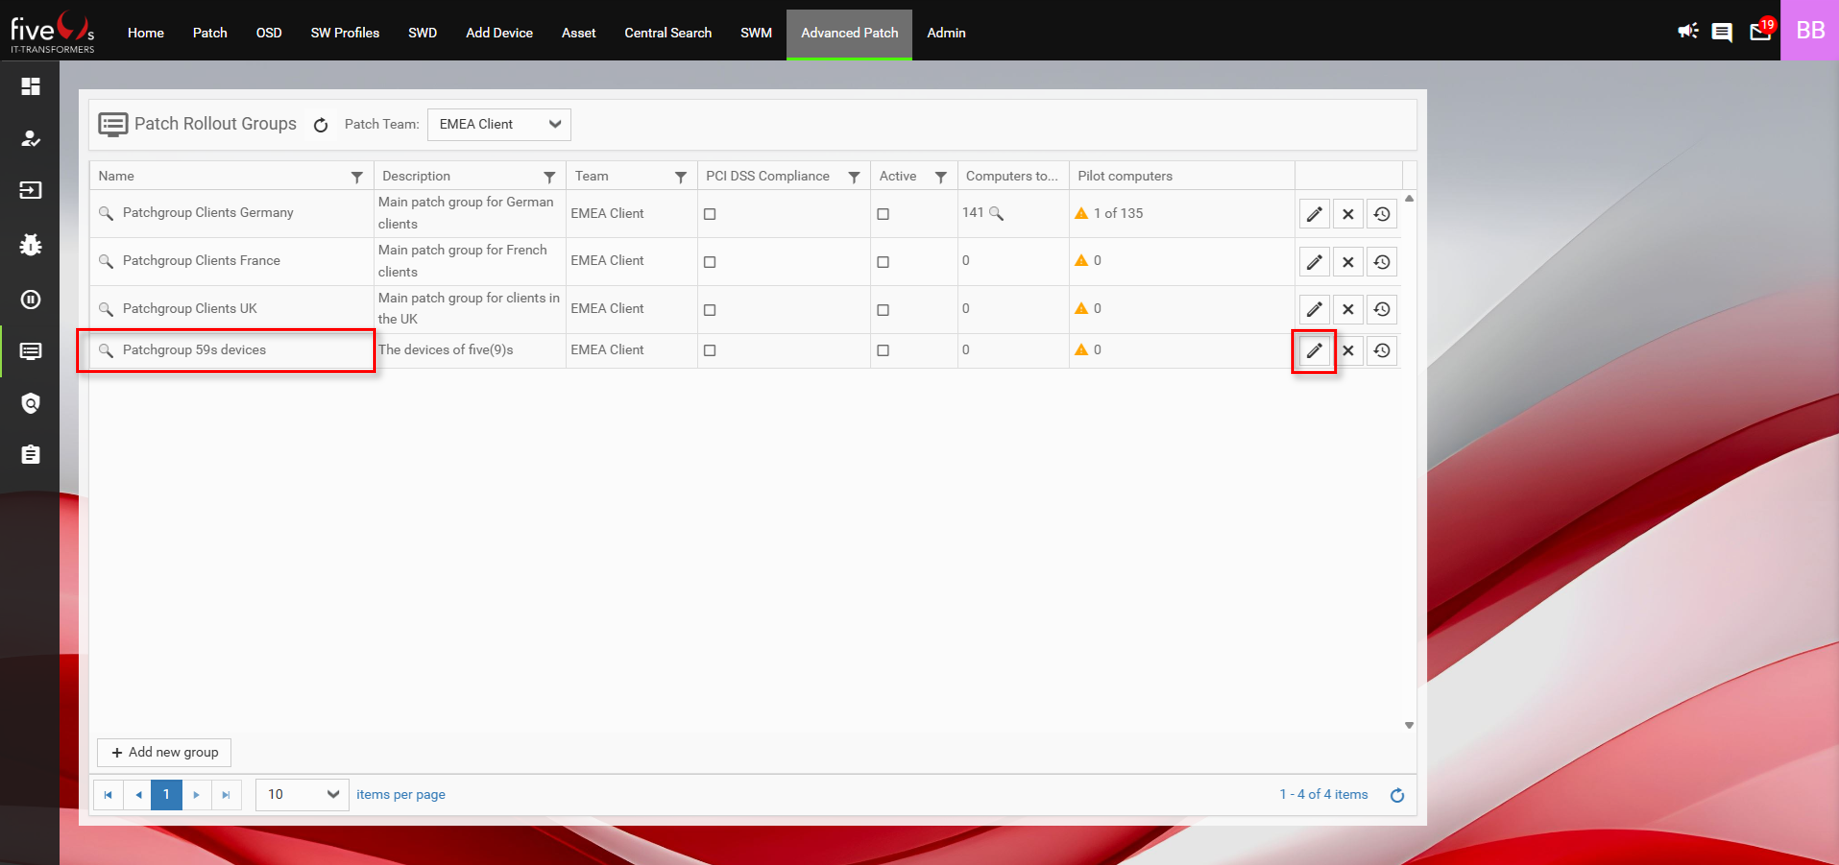
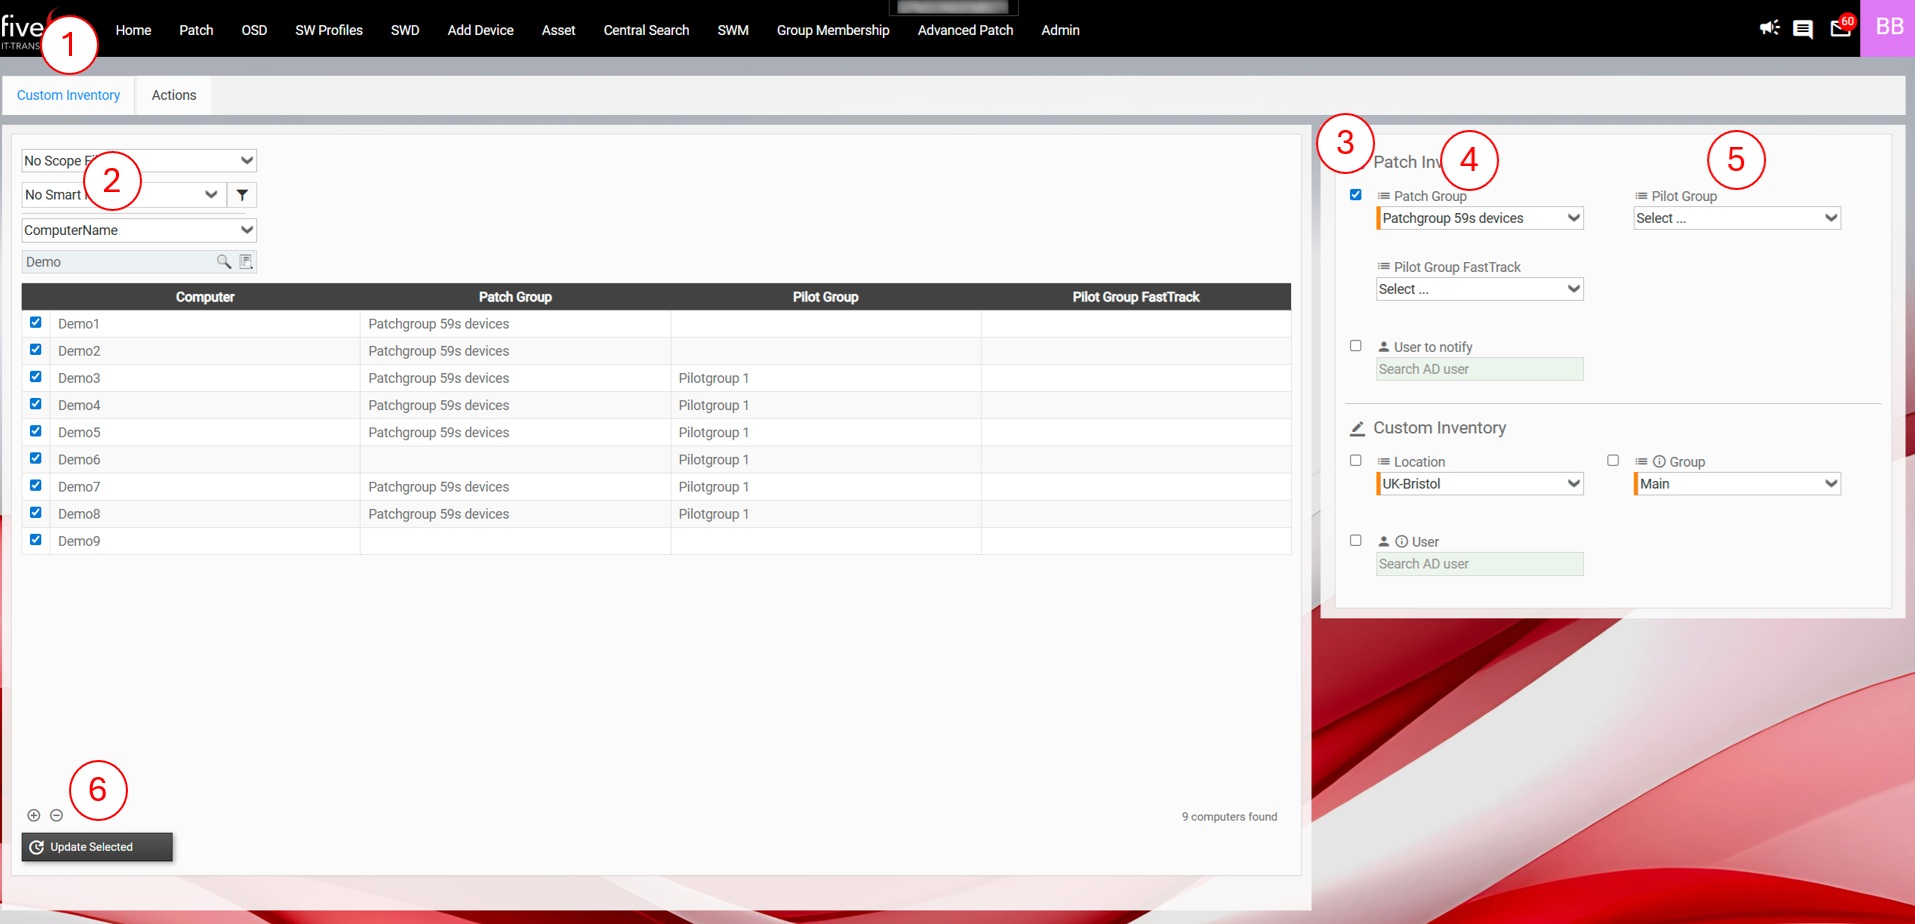
3.6. Assigning devices to Patch Rollout Groups
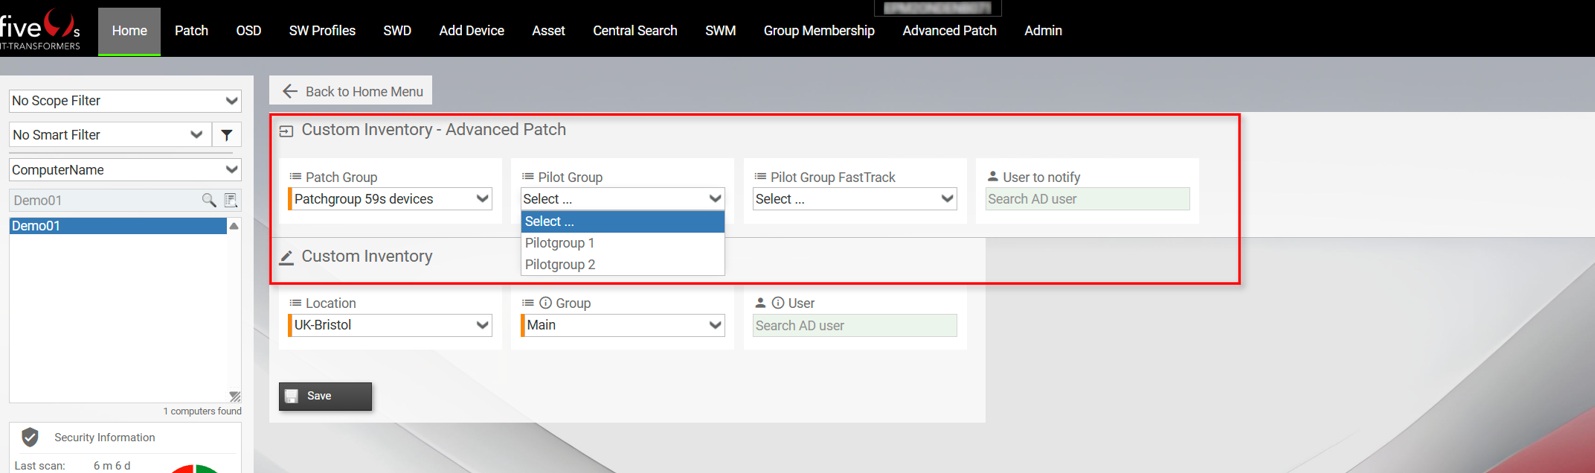
Devices can be assigned to a Patch Rollout Group using the Custom Inventory of the five(9)s Console. When you activate Advanced Patch with a license, patch-related CI objects are automatically added to the Custom Inventory. Go to the Home screen, select a device, and click on Custom Inventory. Then pick a Patch Group, and optionally a Pilot Group and a User to notify.
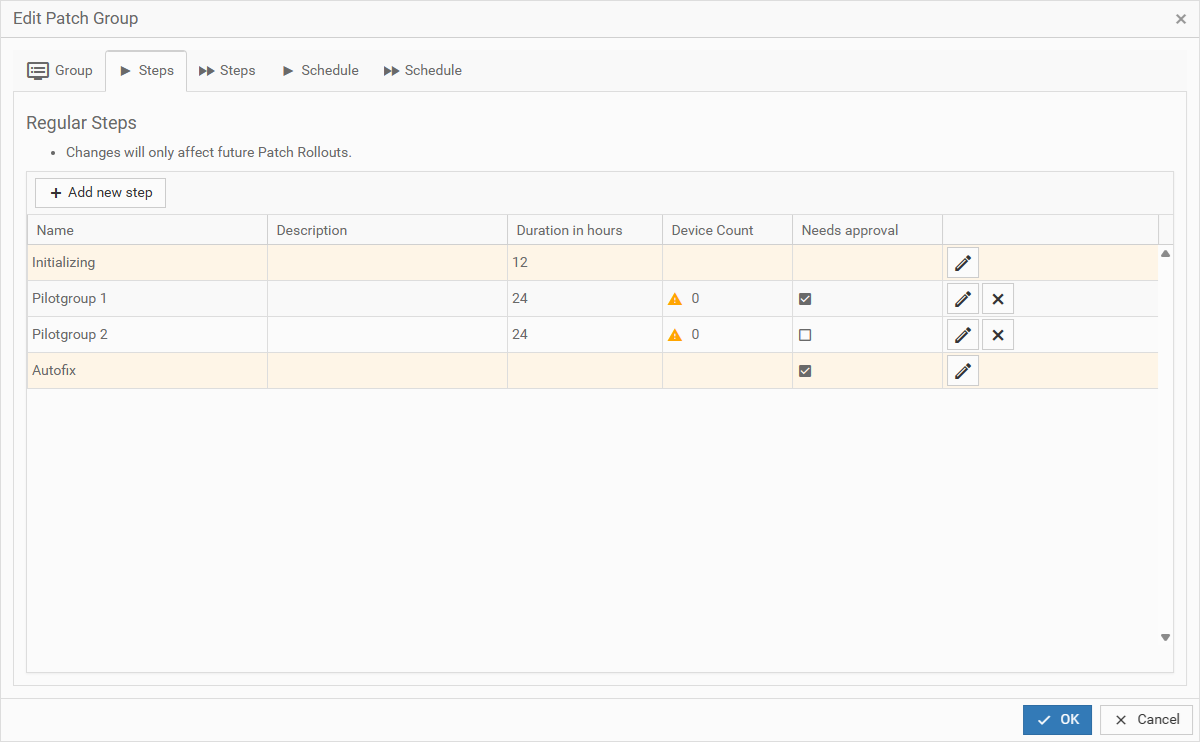
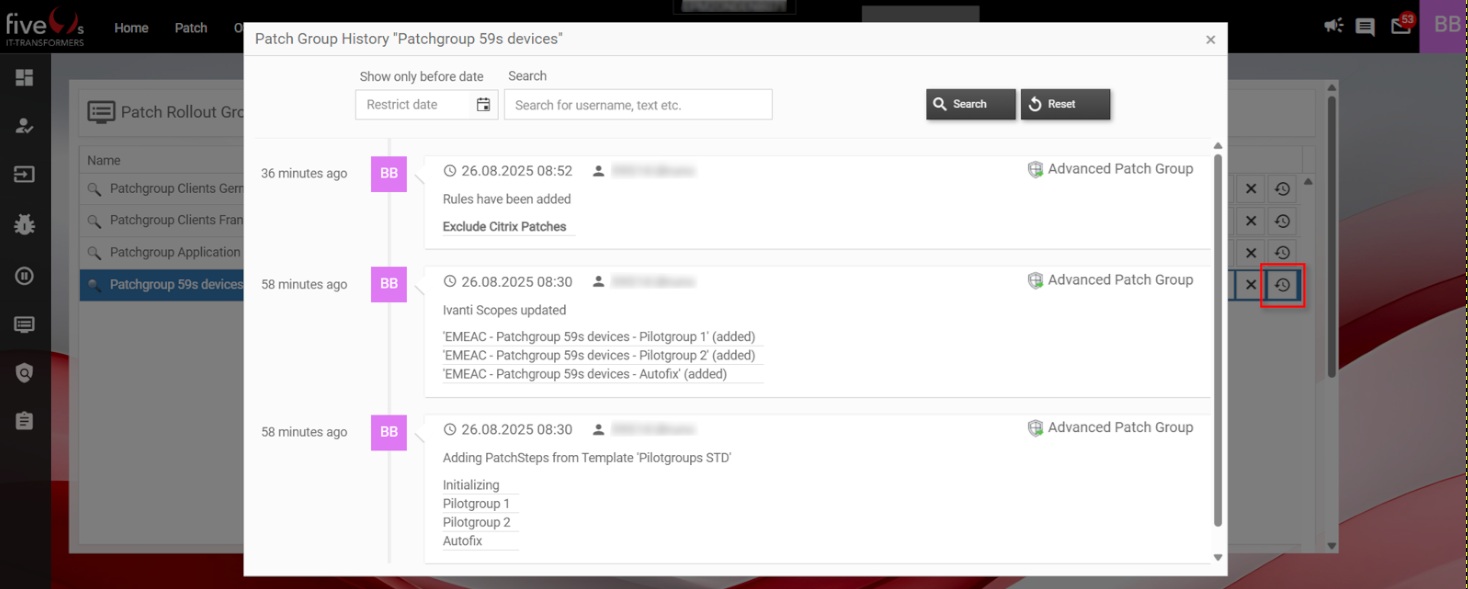
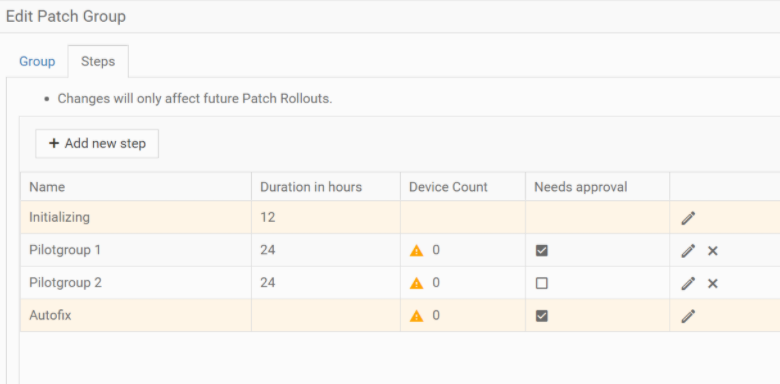
The values depend on the settings you made earlier. The following screenshots show the Edit Patch Group dialog we completed earlier. It displays the Patch Rollout Group Patchgroup 59s and its included steps:


3.7. Activate Patch Groups
4. Working with Advanced Patch
4.1. Using the Dashboard to Monitor Patch Processes
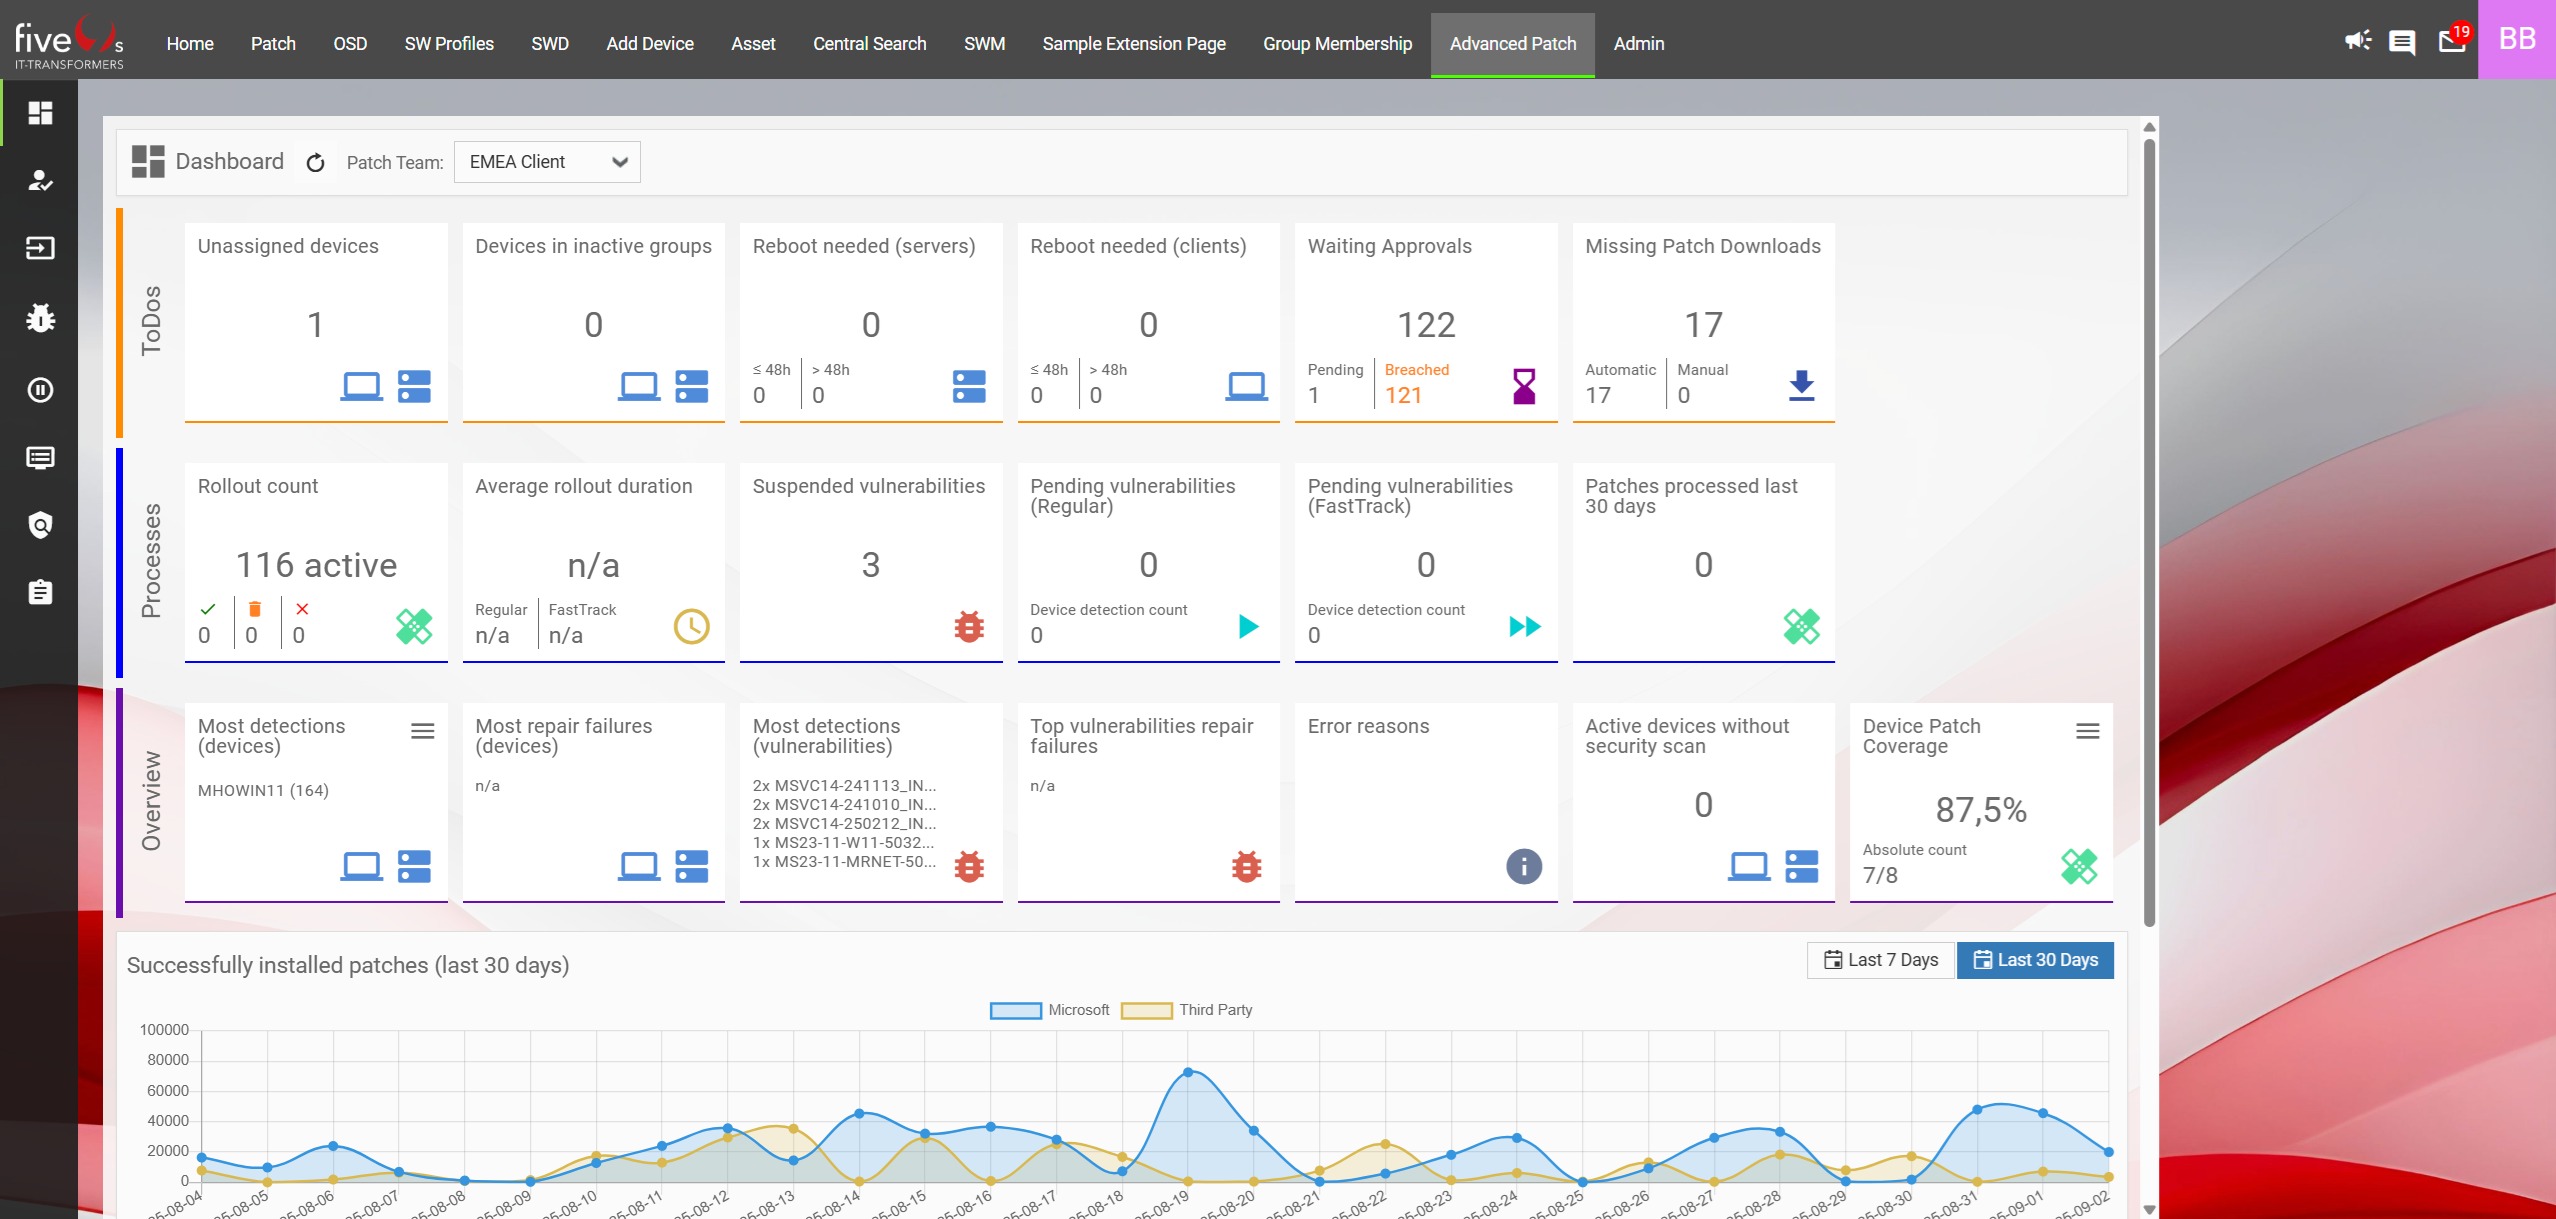
To see more details about the numbers displayed on a tile, hover over the icons in the bottom-right corner.
4.2. Patch Rollouts
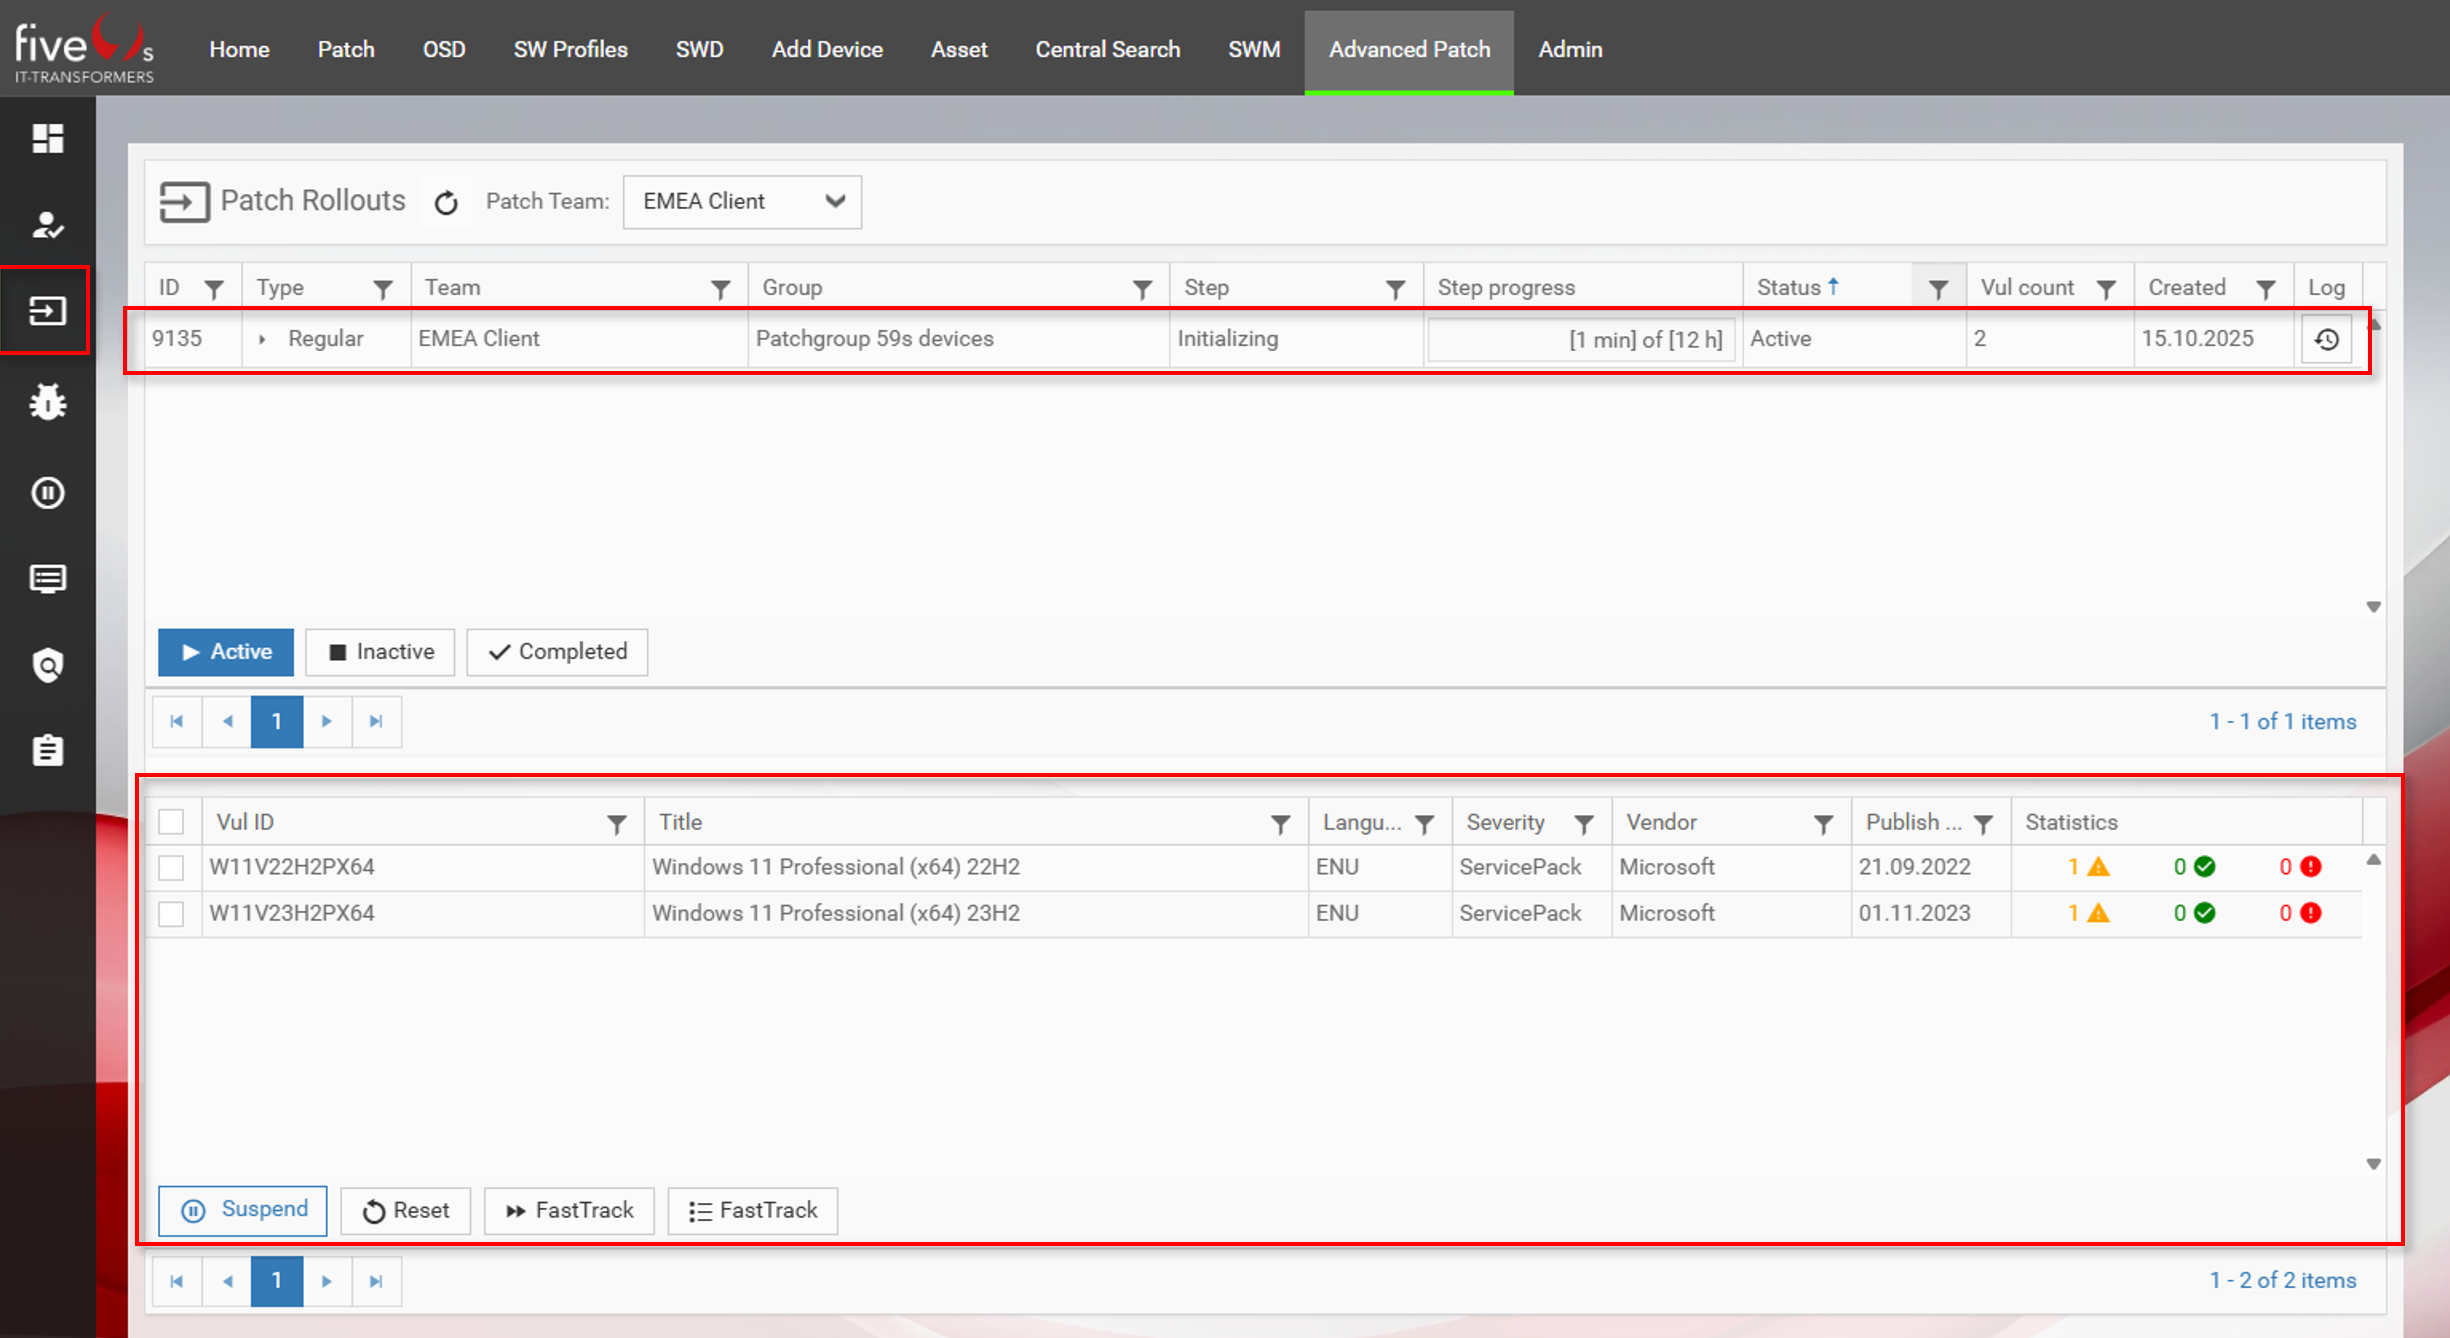
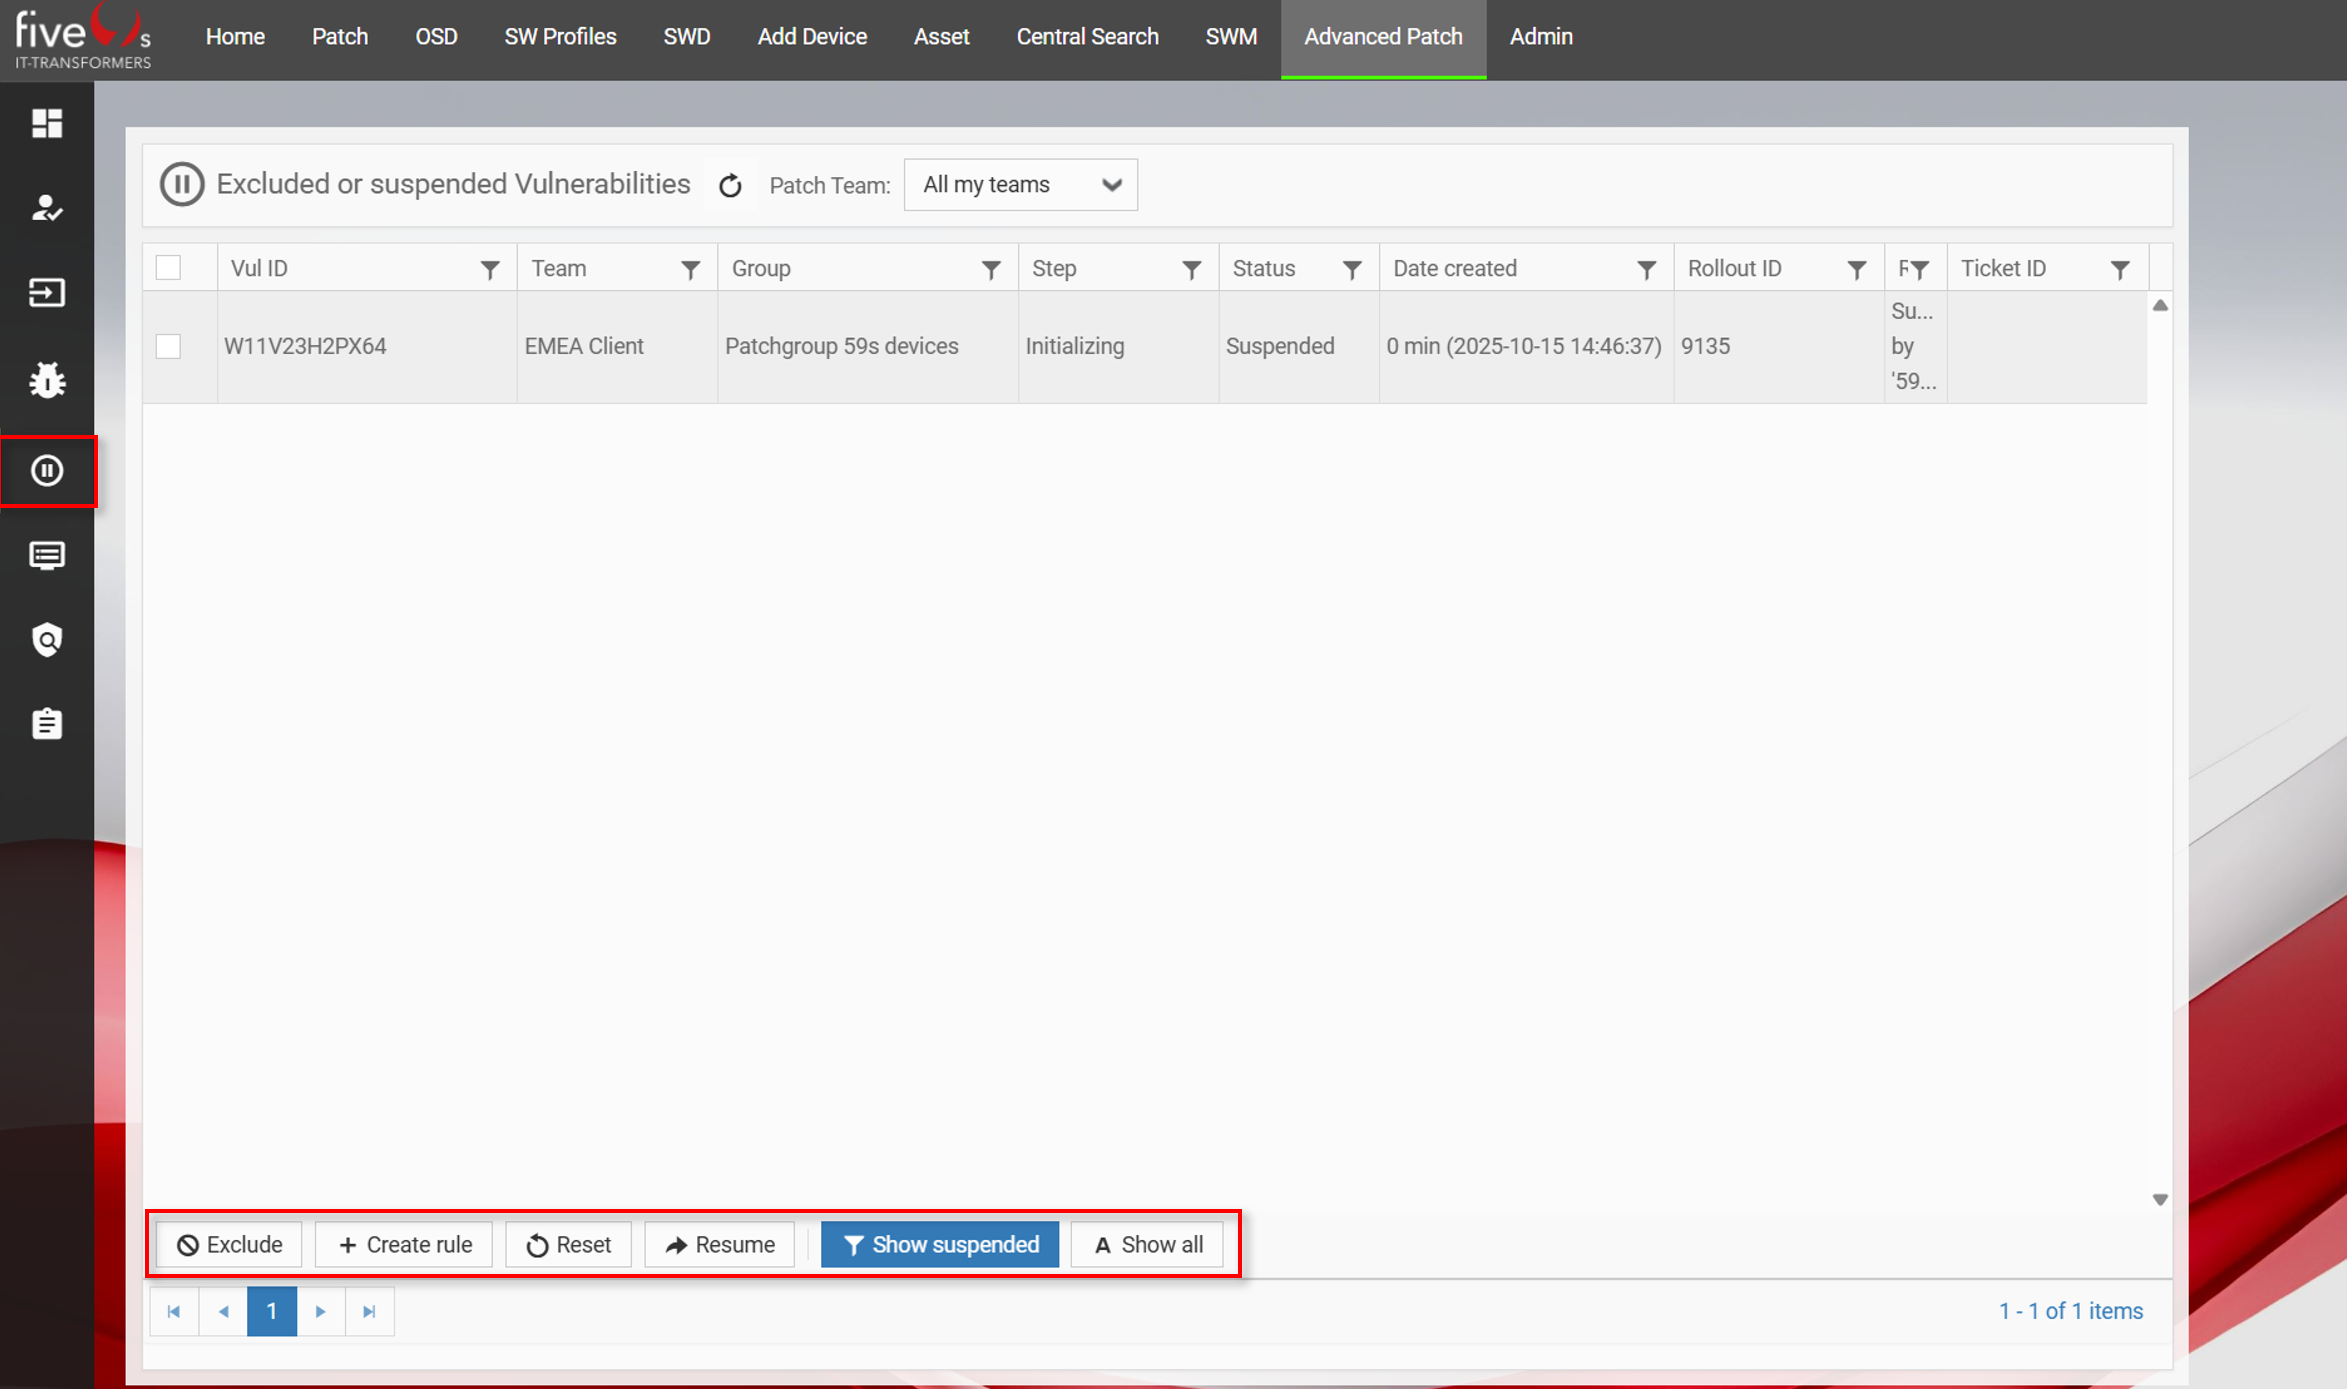
Info: As you can see, the Patch Rollout for group Patchgroup 59s devices is in step Initializing and has a vulnerability count of 2.
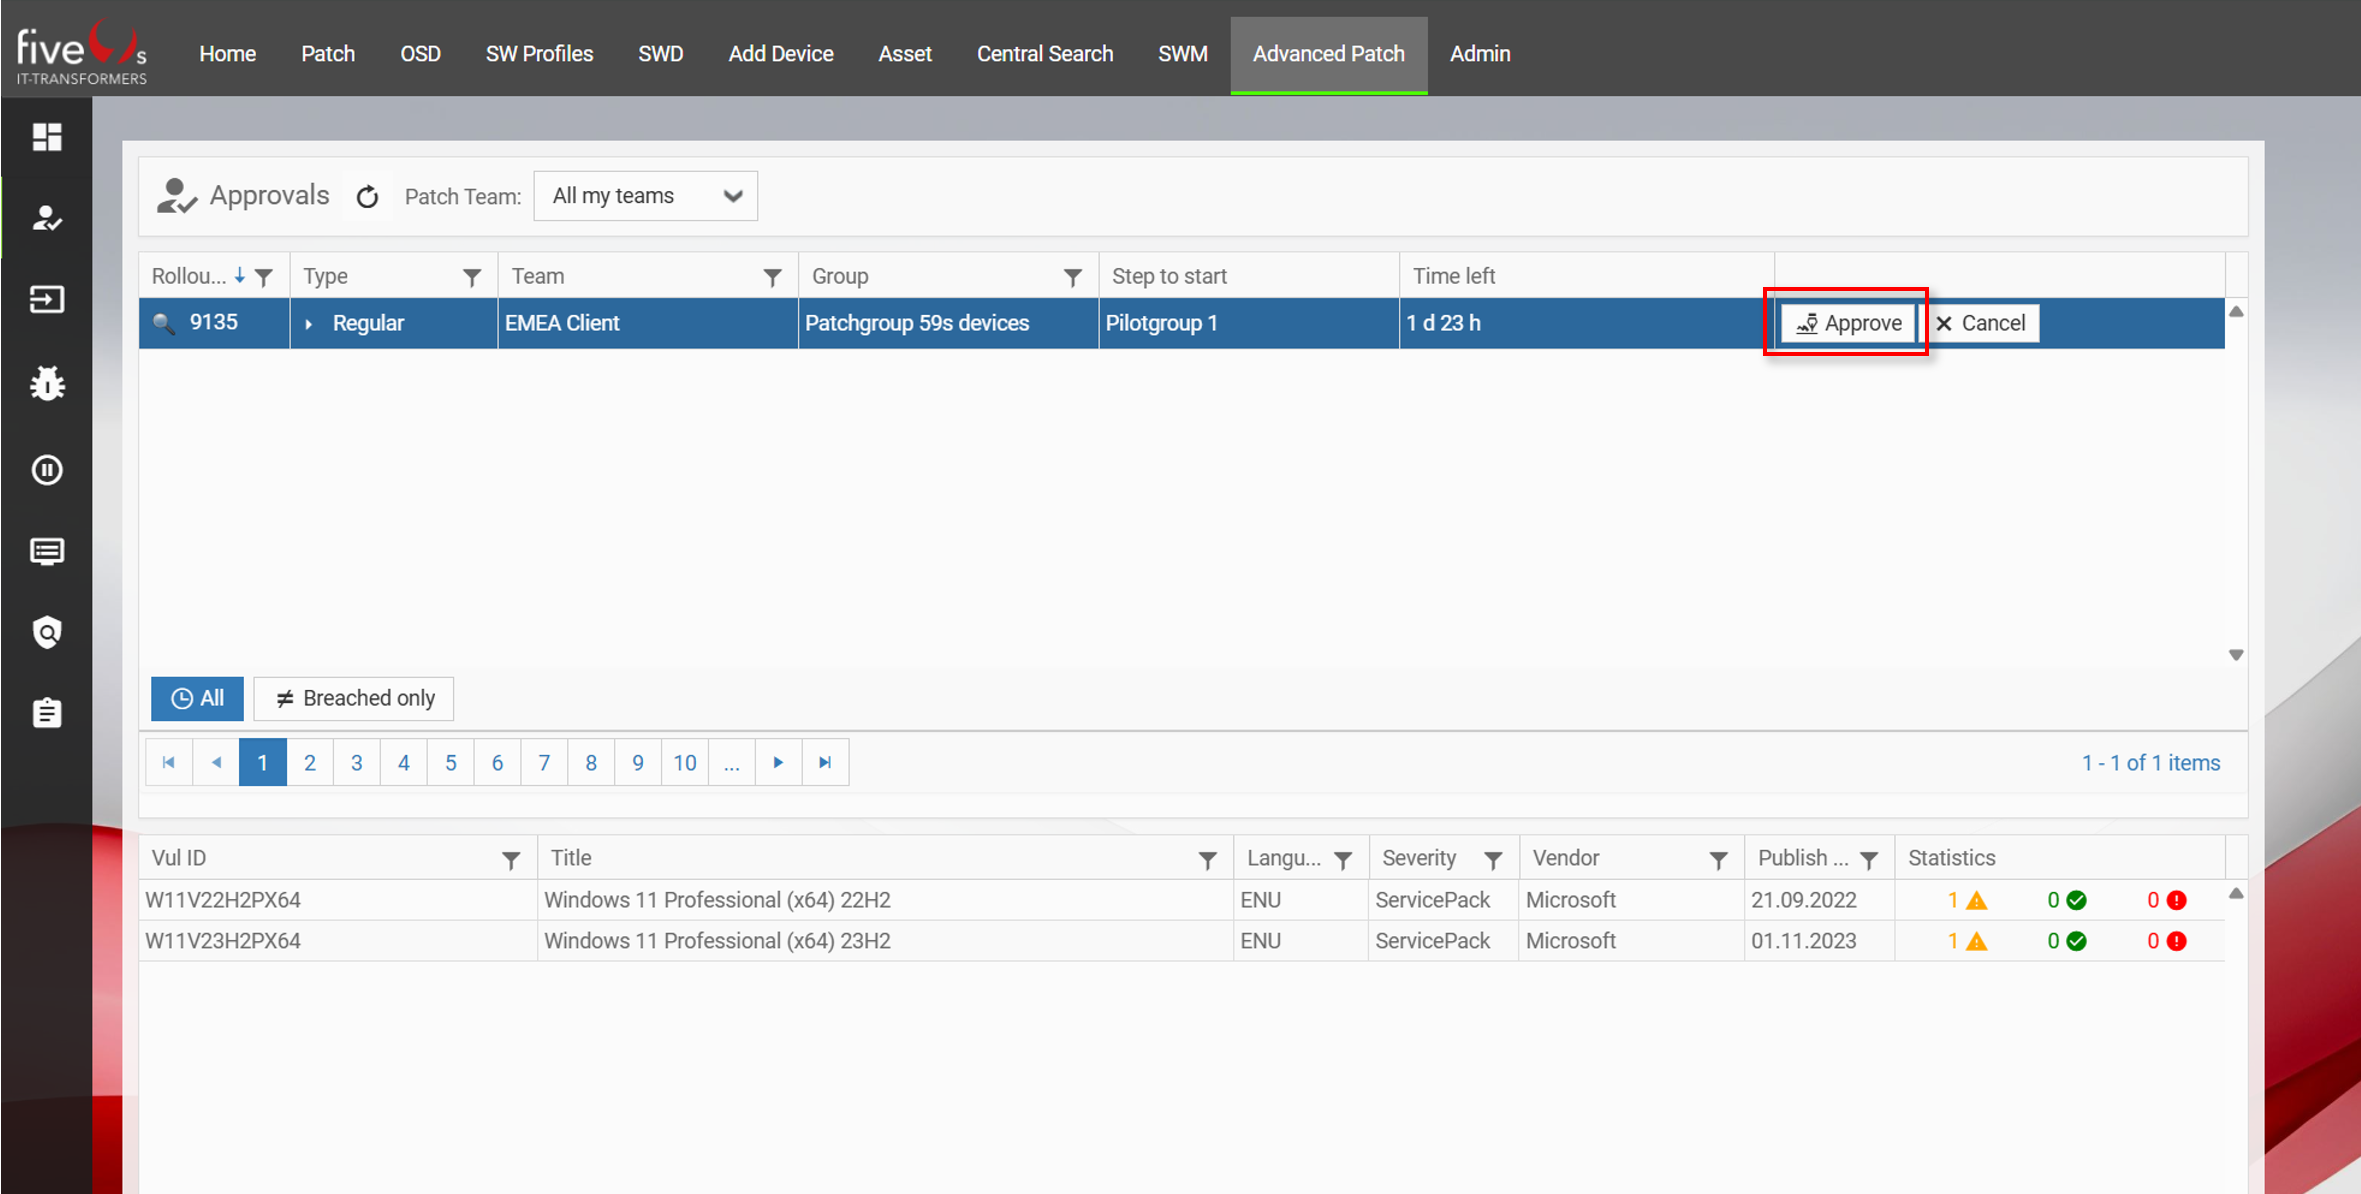
4.3. Approvals
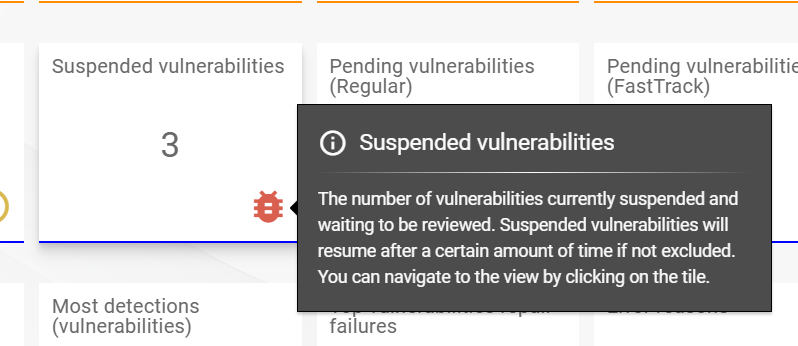
4.4. Suspended and Excluded Vulnerabilities


4.5. Using Vulnerabiltiy Insights to get a Status Overview and Troubleshooting Tips
That leads you to the Vulnerability Insights dialog:
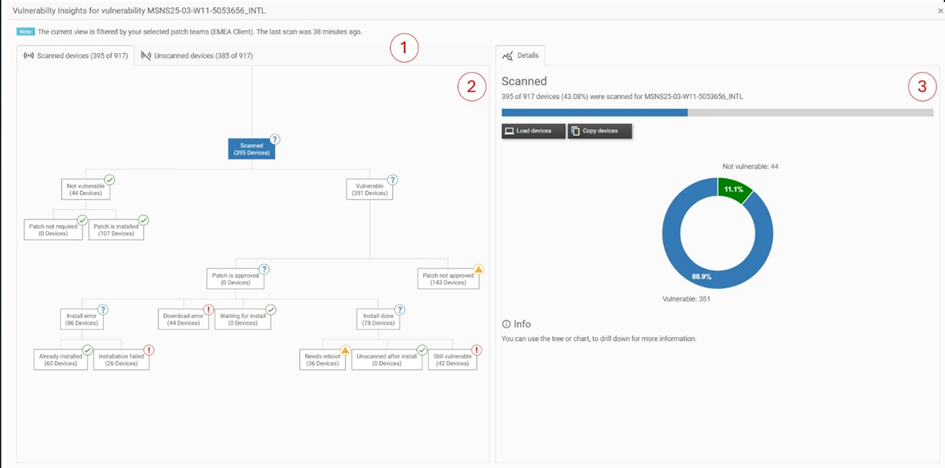
At the top left (1) of the Vulnerability Insights view, you will find two tabs for all devices, divided into Scanned and Unscanned. The active Scanned tab (2) shows the statuses of all devices that have already been scanned for the selected vulnerability, while the Unscanned tab shows devices that have not yet been scanned. On the right (3), the Details section displays information relevant to the currently selected node in the tree on the left.
Every node of the tree represents a specific status regarding the vulnerability. Group nodes (nodes with children) organize the structure, while leaf nodes (nodes without children) show specific categorizations with detailed explanations and troubleshooting guidance.
Each node shows a status symbol in the top-right corner, indicating its state:
- Green check mark — These devices are fine.
- Orange warning sign — These devices may have issues.
- Red exclamation mark — These devices have issues.
- Blue question mark — These devices require investigation of their descendants. Technically, this symbol appears on a group node if at least one descendant node is not okay.

If you select a leaf node in a tab, such as Installation failed on the Scanned Tab, a screen like the folllowing will appear:
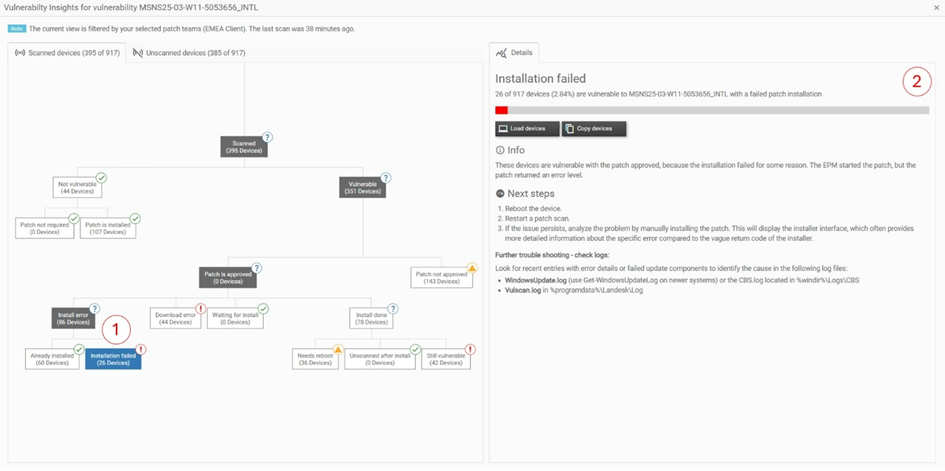
The selected node is highlighted on the left (1) and the Details section on the right shows detailed information (2) . This details section provides Info and Next Steps relevant to the selected node. You can use the information to resolve potential issues. If you want to analyze the devices further you can press on Copy devices to copy their names or on Load devices to move to the home screen and filter for them n the home screen and further analyze them.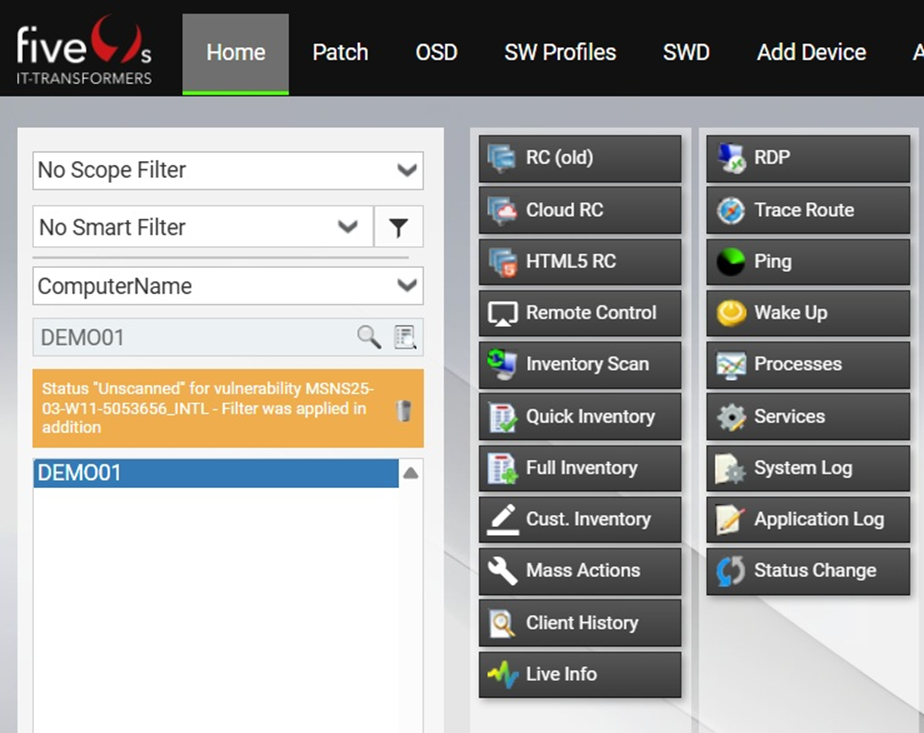
- Patch
- Advanced Patch
- Vulnerability Insights
Disclaimer
Was this article helpful?
That’s Great!
Thank you for your feedback
Sorry! We couldn't be helpful
Thank you for your feedback
Feedback sent
We appreciate your effort and will try to fix the article